How to Lay Landscape Blocks: A Comprehensive Guide for Stunning Results
Are you dreaming of transforming your outdoor space with elegant and durable landscape blocks? Whether you’re building a retaining wall, a charming garden border, or an inviting patio, mastering the art of how to lay landscape blocks is essential for achieving professional-looking results that stand the test of time. This comprehensive guide provides you with everything you need to know, from initial planning and preparation to expert installation techniques and long-term maintenance. We’ll delve into the nuances of working with different types of blocks, ensuring a sturdy and visually appealing finished product. Prepare to elevate your landscaping skills and create an outdoor oasis you’ll be proud of.
Understanding Landscape Blocks: Types, Uses, and Considerations
Before diving into the installation process, it’s crucial to understand the diverse world of landscape blocks. Not all blocks are created equal, and choosing the right type for your project is paramount for both aesthetics and structural integrity.
Common Types of Landscape Blocks:
- Retaining Wall Blocks: Designed for building walls that hold back soil, these blocks are typically larger and heavier, often featuring interlocking systems for enhanced stability.
- Edging Blocks: Ideal for creating borders around gardens, walkways, or patios, these blocks are smaller and more decorative, offering a clean and defined edge.
- Paver Blocks: Used for creating paved surfaces like patios, walkways, and driveways, paver blocks come in various shapes, sizes, and colors, allowing for creative design patterns.
- Coping Blocks: These are used to cap retaining walls or other vertical structures, providing a finished look and protecting the underlying blocks from the elements.
Choosing the Right Block for Your Project:
Consider these factors when selecting landscape blocks:
- Project Requirements: What type of structure are you building? A retaining wall requires different blocks than a garden border.
- Soil Conditions: If you’re building a retaining wall, analyze your soil type to ensure the blocks can withstand the pressure.
- Aesthetic Preferences: Choose blocks that complement your existing landscape and architectural style.
- Budget: Landscape blocks vary in price, so set a budget and explore options within your range.
Essential Tools and Materials for Laying Landscape Blocks
Having the right tools and materials on hand will make the installation process smoother and more efficient. Here’s a comprehensive list:
- Landscape Blocks: Calculate the quantity needed based on your project dimensions, adding extra for cuts and waste.
- Base Material: Crushed gravel or compacted aggregate provides a stable foundation for the blocks.
- Leveling Sand: A thin layer of sand helps to create a perfectly level surface for the first course of blocks.
- Landscape Fabric: Prevents weeds from growing between the blocks.
- Construction Adhesive (for retaining walls): Bonds the blocks together for added stability.
- Safety Glasses and Gloves: Protect your eyes and hands during the installation process.
- Shovel and Rake: For spreading and leveling the base material and sand.
- Tamper or Plate Compactor: To compact the base material and create a solid foundation.
- Level: Essential for ensuring the blocks are perfectly level and plumb.
- Rubber Mallet: To gently tap the blocks into place without damaging them.
- Measuring Tape and String Line: For accurate measurements and straight lines.
- Circular Saw with Masonry Blade: For cutting blocks to fit around corners or create custom shapes.
Step-by-Step Guide: How to Lay Landscape Blocks for a Retaining Wall
Let’s walk through the process of how to lay landscape blocks for a retaining wall. This project requires careful planning and execution to ensure structural integrity.
Step 1: Planning and Preparation
Before you even touch a block, meticulous planning is crucial. This includes:
- Checking Local Codes: Many municipalities require permits for retaining walls exceeding a certain height.
- Marking the Area: Use stakes and string to define the exact location and dimensions of the wall.
- Excavating the Site: Dig a trench deep enough to accommodate the base material and the first course of blocks. The depth will depend on the height of the wall and local frost lines.
Step 2: Creating a Solid Foundation
The foundation is the most critical part of the retaining wall. A weak foundation will lead to failure down the line.
- Base Material: Spread a layer of crushed gravel or compacted aggregate at the bottom of the trench. The thickness will vary depending on the wall height, but a minimum of 6 inches is generally recommended.
- Compaction: Use a tamper or plate compactor to thoroughly compact the base material. This creates a solid, level surface for the blocks.
- Leveling Sand: Add a thin layer of leveling sand (about 1 inch) over the compacted base. This will help you fine-tune the level of the first course of blocks.
Step 3: Laying the First Course of Blocks
This is where precision is key. The first course must be perfectly level, as it will dictate the alignment of the entire wall.
- Positioning: Place the first block in the trench, ensuring it is aligned with your string line.
- Leveling: Use a level to check the block’s level both horizontally and vertically. Adjust the sand beneath the block as needed to achieve perfect level.
- Repeat: Continue laying the first course of blocks, ensuring each block is level and tightly butted against its neighbor.
Step 4: Building Subsequent Courses
Once the first course is complete, you can begin building the remaining courses. Many retaining wall blocks have an interlocking system that helps to create a stable wall.
- Staggering Joints: Stagger the joints between the blocks in each course to create a stronger, more visually appealing wall. This is similar to how bricks are laid.
- Construction Adhesive: Apply construction adhesive to the top of each block before placing the next course. This will bond the blocks together and provide added stability, especially for taller walls.
- Backfill: As you build each course, backfill behind the wall with gravel. This will help to improve drainage and reduce pressure on the wall.
- Leveling and Alignment: Continuously check the level and alignment of each course as you build. Make adjustments as needed to ensure the wall remains straight and plumb.
Step 5: Capping the Wall
The final step is to cap the wall with coping blocks. This will provide a finished look and protect the underlying blocks from the elements.
- Adhesive: Apply construction adhesive to the top course of blocks.
- Placement: Carefully place the coping blocks on top of the adhesive, ensuring they are evenly spaced and aligned.
- Finishing Touches: Once the adhesive has dried, fill the gaps between the coping blocks with mortar or joint sand.
Laying Landscape Blocks for a Garden Border
Creating a garden border with landscape blocks is a simpler project than building a retaining wall, but it still requires careful planning and execution.
Step 1: Mark and Excavate
Mark the desired shape and location of your border. Excavate a shallow trench along the marked line, removing any grass or debris.
Step 2: Prepare the Base
Add a layer of gravel or sand to the trench and compact it to create a level base.
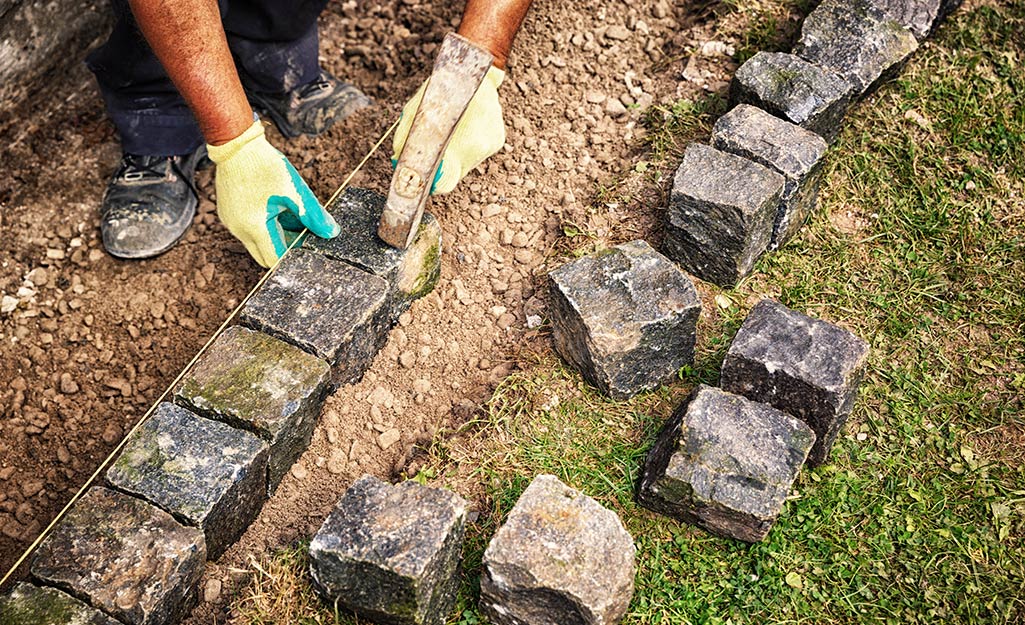
Step 3: Lay the Blocks
Place the landscape blocks along the prepared base, ensuring they are level and aligned. You can use a rubber mallet to gently tap them into place.
Step 4: Backfill and Finish
Backfill around the blocks with soil or mulch. You can also add decorative gravel or stones to enhance the look of your border.
Common Mistakes to Avoid When Laying Landscape Blocks
Even experienced DIYers can make mistakes when how to lay landscape blocks. Here are some common pitfalls to avoid:
- Poor Foundation: A weak or uneven foundation is the most common cause of retaining wall failure.
- Inadequate Drainage: Proper drainage is essential for preventing water buildup behind the wall.
- Incorrect Block Selection: Choosing the wrong type of block for your project can compromise its structural integrity.
- Ignoring Local Codes: Failing to obtain necessary permits can result in fines or project delays.
- Rushing the Process: Taking your time and paying attention to detail will result in a higher-quality, longer-lasting project.
Maintaining Your Landscape Block Project
Once your landscape block project is complete, proper maintenance is essential for preserving its beauty and structural integrity. Here are some tips:
- Regular Cleaning: Hose down the blocks regularly to remove dirt and debris.
- Weed Control: Remove weeds that grow between the blocks to prevent them from damaging the structure.
- Sealing: Apply a sealant to the blocks to protect them from stains and weathering.
- Inspecting: Regularly inspect the structure for any signs of damage or deterioration.
Advanced Techniques and Design Ideas
Once you’ve mastered the basics of how to lay landscape blocks, you can explore more advanced techniques and design ideas to create truly unique and stunning outdoor spaces.
Creating Curves and Angles
Landscape blocks can be used to create curves and angles in your retaining walls, borders, or patios. This requires careful planning and cutting of the blocks to fit the desired shape.
Incorporating Lighting
Adding landscape lighting to your block project can enhance its beauty and functionality. Consider installing lights along the top of a retaining wall or within a patio to create a warm and inviting ambiance.
Mixing and Matching Colors and Textures
Experiment with different colors and textures of landscape blocks to create unique and visually appealing designs. You can combine different block types or create patterns using contrasting colors.
The Durability and Longevity of Landscape Blocks
Landscape blocks are renowned for their durability and longevity, making them a cost-effective and sustainable choice for outdoor projects. When properly installed and maintained, landscape blocks can last for decades, withstanding harsh weather conditions and heavy use.
Material Composition and Weather Resistance
Most landscape blocks are made from concrete, which is a highly durable and weather-resistant material. Concrete blocks can withstand freezing temperatures, heavy rain, and intense sunlight without cracking or deteriorating.
Interlocking Systems and Structural Integrity
Many landscape blocks feature interlocking systems that enhance their structural integrity. These systems help to distribute weight evenly and prevent the blocks from shifting or settling over time.
The Eco-Friendly Aspects of Using Landscape Blocks
In addition to their durability and aesthetic appeal, landscape blocks can also be an eco-friendly choice for your outdoor projects.
Recycled Materials and Sustainable Manufacturing
Some landscape block manufacturers use recycled materials in their products, reducing the demand for virgin resources. Additionally, sustainable manufacturing processes can minimize the environmental impact of block production.
Permeable Pavers and Stormwater Management
Permeable pavers are a type of landscape block that allows water to drain through the surface and into the ground. This can help to reduce stormwater runoff and recharge groundwater supplies.
Expert Tips for Choosing Landscape Block Suppliers
Selecting the right supplier for your landscape blocks is just as important as choosing the right type of block. Here are some expert tips to guide your decision:
- Reputation and Experience: Look for suppliers with a proven track record of providing high-quality products and excellent customer service.
- Product Variety: Choose a supplier that offers a wide range of landscape blocks to suit your specific needs and aesthetic preferences.
- Pricing and Availability: Compare prices from different suppliers and ensure they have the blocks you need in stock.
- Delivery Options: Consider the supplier’s delivery options and ensure they can deliver the blocks to your job site in a timely manner.
- Warranty and Support: Ask about the supplier’s warranty and support policies to ensure you’re protected in case of any defects or issues.
The Future of Landscape Block Technology
The landscape block industry is constantly evolving, with new technologies and innovations emerging all the time. Here are some trends to watch for in the future:
- Smart Blocks: Landscape blocks with built-in sensors and connectivity that can monitor soil moisture, temperature, and other environmental factors.
- 3D-Printed Blocks: Custom-designed landscape blocks that can be created using 3D printing technology.
- Self-Healing Blocks: Landscape blocks with the ability to repair themselves from cracks and damage.
FAQ: Your Questions About Laying Landscape Blocks Answered
Here are some frequently asked questions about how to lay landscape blocks, along with expert answers:
-
What is the best base material for a retaining wall?
Crushed gravel or compacted aggregate is generally considered the best base material for a retaining wall. It provides excellent drainage and stability.
-
How deep should I dig for a retaining wall foundation?
The depth of the excavation will depend on the height of the wall and local frost lines. A general rule of thumb is to dig at least 6 inches below the frost line.
-
Do I need to use construction adhesive for all retaining walls?
Construction adhesive is highly recommended for taller retaining walls to provide added stability. For shorter walls, it may not be necessary, but it’s still a good idea.
-
How do I cut landscape blocks?
A circular saw with a masonry blade is the best tool for cutting landscape blocks. Always wear safety glasses and gloves when cutting blocks.
-
How do I prevent weeds from growing between the blocks?
Landscape fabric is an effective way to prevent weeds from growing between the blocks. Install it beneath the blocks and around the edges.
-
What is the best way to clean landscape blocks?
Hose down the blocks regularly with water to remove dirt and debris. You can also use a mild detergent if necessary.
-
How often should I seal my landscape blocks?
Sealing frequency depends on the sealant and the climate. Check the sealant manufacturer’s instructions. Typically, every 2-3 years is recommended.
-
Can I build a retaining wall on a slope?
Yes, but it requires careful planning and engineering. Consult with a professional if you’re building a retaining wall on a steep slope.
-
What are the signs of a failing retaining wall?
Signs of a failing retaining wall include leaning, cracking, bulging, and water buildup behind the wall.
-
How do I repair a damaged landscape block?
Small cracks can be repaired with concrete patching compound. For larger damage, the block may need to be replaced.
Conclusion: Mastering the Art of Laying Landscape Blocks
Mastering how to lay landscape blocks opens up a world of possibilities for transforming your outdoor space. From building sturdy retaining walls to creating charming garden borders, the versatility and durability of landscape blocks make them an excellent choice for any landscaping project. By following the steps outlined in this guide, you can achieve professional-looking results that will enhance the beauty and value of your property for years to come.
We’ve shared our extensive knowledge, gleaned from years of experience observing and occasionally participating in landscaping projects, and distilled expert consensus. Now it’s your turn to put these skills to the test. Share your experiences and challenges in the comments below, and let’s learn from each other’s journeys in the world of landscape blocks. And if you’re ready to take your landscaping skills to the next level, explore our advanced guide to interlocking paver installation!

