How to Take Off the Pedals of a Bike: A Comprehensive Guide
Struggling to remove the pedals from your bike? Whether you’re upgrading to new pedals, packing your bike for travel, or simply performing routine maintenance, knowing how to take off the pedals of a bike is an essential skill for any cyclist. This comprehensive guide will walk you through every step of the process, from identifying the correct tools to understanding the intricacies of pedal threading. We’ll cover everything you need to know, ensuring a smooth and hassle-free experience. Our goal is to provide you with the most detailed, reliable, and expert advice available, so you can confidently tackle this task and keep your bike in top condition.
Understanding Bike Pedal Basics
Before diving into the removal process, it’s crucial to understand the fundamental aspects of bike pedals. This knowledge will not only make the removal process easier but also help you avoid potential damage to your bike.
Why Removing Bike Pedals is Necessary
There are several reasons why you might need to remove your bike pedals:
- Upgrading Pedals: Switching to clipless pedals or a different style of platform pedal.
- Bike Maintenance: Cleaning, lubricating, or replacing worn-out pedals.
- Bike Transportation: Removing pedals to reduce the width of the bike for easier packing and transportation, especially when using bike boxes or car racks.
- Frame Protection: Preventing pedal damage to the frame during storage or transit.
Pedal Threading: A Critical Detail
One of the most important things to know about bike pedals is their threading. The right pedal (the one on the drive side, or the side with the gears) has a standard right-hand thread, meaning you tighten it by turning it clockwise and loosen it by turning it counter-clockwise. The left pedal has a left-hand thread (also called a reverse thread), so you tighten it by turning it counter-clockwise and loosen it by turning it clockwise. This seemingly counterintuitive design prevents the pedals from loosening while you ride. Trying to force the pedals in the wrong direction can damage the threads on the crank arm, leading to costly repairs. Always remember: Righty tighty, lefty loosey only applies to the right pedal. The left pedal is the opposite!
Identifying Your Pedal Type
Bike pedals come in various types, and the removal process can slightly differ depending on the type. Common types include:
- Platform Pedals: Flat pedals with a wide surface for regular shoes.
- Clipless Pedals: Pedals that require special cycling shoes with cleats that clip into the pedal mechanism.
- Hybrid Pedals: Pedals with one side for regular shoes and the other side for clipless cycling shoes.
Tools You’ll Need
Having the right tools is essential for removing bike pedals efficiently and without causing damage. Here’s a list of the tools you’ll need:
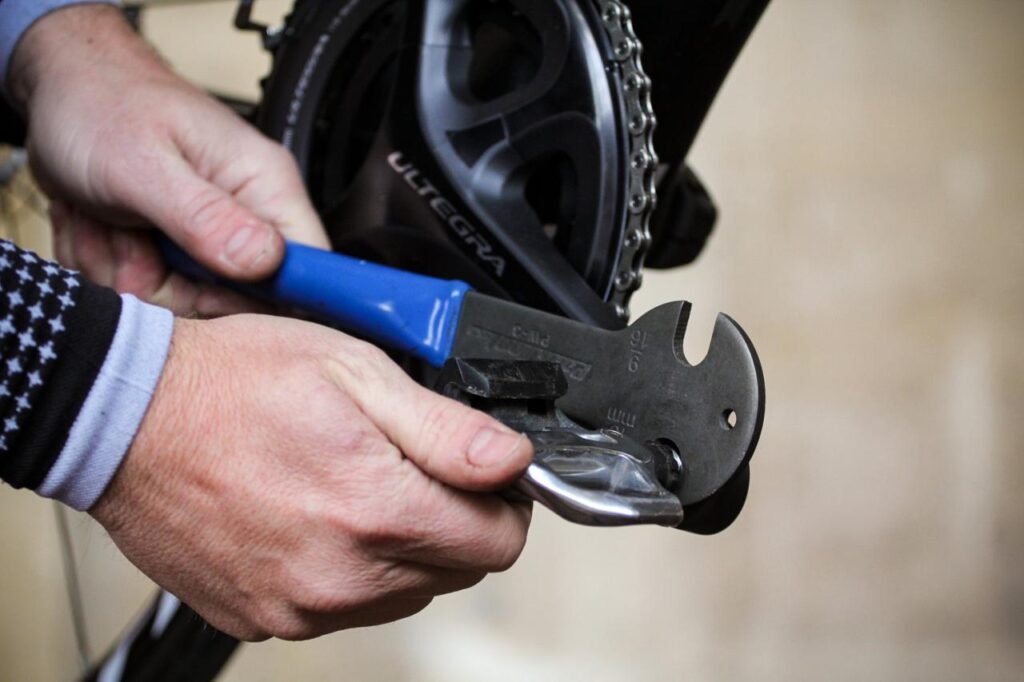
- Pedal Wrench: A long-handled wrench specifically designed for removing bike pedals. It’s typically 15mm.
- Allen Wrench (Hex Wrench): Some pedals have an Allen bolt on the inside of the crank arm for removal. The size can vary, but 6mm or 8mm are common.
- Crank Arm Protection (Optional): Using a piece of cardboard or cloth to protect the crank arm from scratches.
- Gloves: To protect your hands and improve grip.
- Penetrating Oil (Optional): For pedals that are stuck or corroded.
- Grease: To apply to the pedal threads before reinstalling them.
Step-by-Step Guide: How to Take Off the Pedals of a Bike
Now, let’s get to the actual process of removing the pedals. Follow these steps carefully to ensure a smooth and safe removal:
Step 1: Preparation
Before you start, prepare your bike and your workspace:
- Secure Your Bike: Place your bike on a bike stand or lean it against a stable surface. Make sure it’s stable and won’t move while you’re working on it.
- Protect the Crank Arms: Place a piece of cardboard or cloth between the wrench and the crank arm to prevent scratches.
- Identify the Pedals: Determine which pedal is the right and which is the left. Remember, the right pedal has a standard thread, and the left pedal has a reverse thread.
Step 2: Loosening the Right Pedal (Drive Side)
The right pedal is removed by turning it counter-clockwise (when facing the pedal). This is often the trickiest part, as the pedal might be tightly secured.
- Position the Wrench: Place the pedal wrench on the pedal axle, ensuring it’s securely seated.
- Apply Force: Apply firm, steady pressure to the wrench in a counter-clockwise direction. A long-handled wrench provides more leverage.
- Use Penetrating Oil (If Needed): If the pedal is stuck, apply penetrating oil to the threads and let it sit for a few minutes before trying again.
- Consider Leverage: If you’re having trouble, try extending the wrench’s handle with a pipe or another wrench for added leverage. Be careful not to overdo it and damage the crank arm.
Step 3: Removing the Right Pedal
Once you’ve loosened the right pedal, continue turning the wrench counter-clockwise until the pedal is completely removed from the crank arm.
Step 4: Loosening the Left Pedal (Non-Drive Side)
The left pedal is removed by turning it clockwise (when facing the pedal). This is the opposite of the right pedal.
- Position the Wrench: Place the pedal wrench on the pedal axle, ensuring it’s securely seated.
- Apply Force: Apply firm, steady pressure to the wrench in a clockwise direction.
- Use Penetrating Oil (If Needed): If the pedal is stuck, apply penetrating oil to the threads and let it sit for a few minutes before trying again.
Step 5: Removing the Left Pedal
Once you’ve loosened the left pedal, continue turning the wrench clockwise until the pedal is completely removed from the crank arm.
Step 6: Cleaning and Inspecting the Threads
After removing the pedals, clean the threads on both the pedals and the crank arms. Inspect the threads for any damage or wear. If the threads are damaged, you may need to have them re-tapped or replace the crank arms.
Step 7: Applying Grease
Before reinstalling the pedals, apply a thin layer of grease to the threads. This will prevent the pedals from seizing and make them easier to remove in the future. Use a good quality bicycle grease.
Step 8: Reinstalling the Pedals
Reinstall the pedals, making sure to tighten them securely. Remember to tighten the right pedal clockwise and the left pedal counter-clockwise.
- Start by Hand: Thread the pedals into the crank arms by hand to avoid cross-threading.
- Tighten with Wrench: Once you’ve threaded them in as far as you can by hand, use the pedal wrench to tighten them securely.
Troubleshooting Common Issues
Sometimes, removing bike pedals can be challenging. Here are some common issues and how to address them:
Stuck Pedals
If the pedals are stuck, try the following:
- Penetrating Oil: Apply penetrating oil and let it sit for several minutes.
- Heat: Apply heat to the crank arm around the pedal axle. This can help loosen the threads. Use a heat gun or hair dryer carefully.
- Leverage: Use a longer wrench or extend the handle of your existing wrench for more leverage.
Stripped Threads
If the threads are stripped, you may need to have them re-tapped or replace the crank arms. Consult a professional bike mechanic for assistance.
Incorrect Threading
Always double-check the threading direction before applying force. Forcing the pedals in the wrong direction can damage the threads.
Choosing the Right Bike Pedals
Selecting the right bike pedals depends on your riding style, preferences, and type of bike. Here’s a brief overview of different pedal types and their applications:
Platform Pedals
Platform pedals are versatile and suitable for various riding styles, including commuting, recreational riding, and mountain biking. They offer a wide surface for regular shoes and provide good grip. Brands like Race Face and DMR offer high-quality platform pedals with replaceable pins for enhanced grip.
Clipless Pedals
Clipless pedals provide a more secure connection between your feet and the bike, improving pedaling efficiency and control. They require special cycling shoes with cleats that clip into the pedal mechanism. Shimano SPD and Look Keo are popular clipless pedal systems.
Hybrid Pedals
Hybrid pedals offer the best of both worlds, with one side for regular shoes and the other side for clipless cycling shoes. They are a good option for riders who want the convenience of platform pedals and the performance benefits of clipless pedals. Shimano Click’r pedals are a popular choice.
Maintaining Your Bike Pedals
Regular maintenance is essential for keeping your bike pedals in good condition. Here are some tips:
- Cleaning: Clean your pedals regularly to remove dirt, grime, and debris.
- Lubrication: Lubricate the pedal bearings to ensure smooth operation.
- Inspection: Inspect the pedals for any signs of wear or damage.
- Tightening: Check the pedal threads periodically and tighten them if necessary.
Expert Tips and Tricks
Based on our extensive experience with bike maintenance, here are some expert tips and tricks for removing and installing bike pedals:
- Use the Right Tools: Always use the correct tools for the job. A pedal wrench or Allen wrench is essential.
- Apply Penetrating Oil: If the pedals are stuck, apply penetrating oil and let it sit for several minutes.
- Protect the Crank Arms: Use a piece of cardboard or cloth to protect the crank arms from scratches.
- Grease the Threads: Always grease the pedal threads before reinstalling them.
- Tighten Securely: Tighten the pedals securely, but don’t overtighten them.
Advantages of Knowing How to Remove Bike Pedals
Knowing how to take off the pedals of a bike offers several significant advantages:
- Cost Savings: You can perform pedal maintenance and replacements yourself, saving money on bike shop fees.
- Convenience: You can remove pedals for transportation or storage whenever needed.
- Improved Bike Performance: Regular pedal maintenance ensures smooth operation and optimal performance.
- Extended Pedal Lifespan: Proper maintenance and care can extend the lifespan of your pedals.
Review of Shimano SPD Pedals (Example)
Shimano SPD pedals are a popular choice among cyclists for their reliability, durability, and performance. Here’s a detailed review:
User Experience & Usability
Shimano SPD pedals are known for their easy engagement and disengagement. The adjustable tension allows you to customize the feel to your preference. The open design sheds mud and debris effectively, making them suitable for off-road riding.
Performance & Effectiveness
Shimano SPD pedals provide a secure connection between your feet and the bike, improving pedaling efficiency and control. They are a reliable choice for both recreational and competitive cycling.
Pros
- Reliability: Shimano SPD pedals are known for their durability and long lifespan.
- Easy Engagement: The pedals are easy to clip in and out of, even in challenging conditions.
- Adjustable Tension: The tension can be adjusted to suit your preference.
- Mud Shedding: The open design sheds mud and debris effectively.
- Wide Compatibility: Shimano SPD pedals are compatible with a wide range of cycling shoes.
Cons/Limitations
- Weight: Some SPD models can be heavier than other clipless pedal systems.
- Learning Curve: It may take some time to get used to clipping in and out of clipless pedals.
- Cleat Wear: The cleats can wear out over time and need to be replaced.
Ideal User Profile
Shimano SPD pedals are best suited for cyclists who want a reliable and durable clipless pedal system for various riding styles, including commuting, recreational riding, and mountain biking.
Key Alternatives
Alternatives to Shimano SPD pedals include Look Keo pedals and Crankbrothers Eggbeater pedals. Look Keo pedals are popular among road cyclists, while Crankbrothers Eggbeater pedals are favored by mountain bikers.
Expert Overall Verdict & Recommendation
Overall, Shimano SPD pedals are an excellent choice for cyclists who want a reliable, durable, and versatile clipless pedal system. We highly recommend them for riders of all levels.
Q&A Section
Here are some frequently asked questions about removing and installing bike pedals:
- Q: Why are my pedals so hard to remove?
A: Pedals can be hard to remove due to corrosion, lack of lubrication, or overtightening. Apply penetrating oil and use a long-handled wrench for more leverage. - Q: What is the correct direction to loosen the left pedal?
A: The left pedal is loosened by turning it clockwise (when facing the pedal). - Q: Can I use a regular wrench instead of a pedal wrench?
A: While you can use a regular wrench, a pedal wrench is specifically designed for removing bike pedals and provides better leverage and grip. - Q: How often should I grease my pedal threads?
A: You should grease your pedal threads every time you remove and reinstall the pedals. - Q: What type of grease should I use on my pedal threads?
A: Use a good quality bicycle grease. - Q: How do I know if my pedal threads are stripped?
A: If the pedal threads are stripped, the pedal will not tighten properly and may wobble. - Q: Can I re-tap stripped pedal threads?
A: Yes, stripped pedal threads can be re-tapped, but it’s best to consult a professional bike mechanic. - Q: What is the difference between SPD and SPD-SL pedals?
A: SPD pedals are designed for recessed cleats and are suitable for off-road riding, while SPD-SL pedals are designed for external cleats and are optimized for road cycling. - Q: How do I adjust the tension on my clipless pedals?
A: The tension on clipless pedals can be adjusted using a small screw or bolt on the pedal body. Refer to the manufacturer’s instructions for specific details. - Q: What should I do if I can’t remove my pedals even after applying penetrating oil and using a long-handled wrench?
A: If you’re still unable to remove your pedals, consult a professional bike mechanic for assistance. They may have specialized tools or techniques to remove the pedals without damaging the crank arms.
Conclusion
Knowing how to take off the pedals of a bike is a valuable skill for any cyclist. By following the steps outlined in this comprehensive guide, you can confidently remove and reinstall your pedals, perform routine maintenance, and upgrade to new pedals. Remember to use the right tools, apply penetrating oil if needed, and grease the threads before reinstalling the pedals. Whether you are a seasoned cyclist or just starting out, mastering this skill will empower you to maintain your bike and enjoy a smoother, more efficient riding experience. Share your experiences with how to take off the pedals of a bike in the comments below, and explore our advanced guides for more bike maintenance tips.

