How to Disassemble a Single Hole Faucet: A Comprehensive Guide
Are you struggling with a leaky, worn-out, or simply outdated single-hole faucet? Maybe you’re planning a bathroom remodel or need to replace a faulty cartridge. Disassembling a single-hole faucet might seem daunting, but with the right tools, knowledge, and a step-by-step approach, it’s a manageable DIY project. This comprehensive guide will walk you through the entire process of **how to dis assemble single hole faucet**, from initial preparation to complete disassembly, providing expert tips and troubleshooting advice along the way. We aim to provide a resource that’s not just informative but also builds your confidence and saves you money on professional plumbing services. Our extensive experience with various faucet types allows us to provide insights you won’t find elsewhere.
Understanding Single Hole Faucets
A single-hole faucet, as the name suggests, mounts onto a sink or countertop through a single pre-drilled hole. This design, popular for its sleek and modern aesthetic, typically features a single lever or handle that controls both water flow and temperature. Before diving into **how to dis assemble single hole faucet**, it’s crucial to understand its components and how they interact.
The Anatomy of a Single Hole Faucet
* **Faucet Body:** The main structure of the faucet, housing the internal components.
* **Handle:** Controls water flow and temperature.
* **Cartridge:** The core mechanism that regulates water mixing and flow. This is a common culprit for leaks.
* **Spout:** The part of the faucet from which water exits.
* **Aerator:** A screen at the spout’s end that mixes air with water to create a smooth, splash-free flow.
* **Base Plate (Escutcheon):** Covers the mounting hole and provides a decorative finish.
* **Supply Lines:** Flexible tubes that connect the faucet to the water supply.
* **Mounting Hardware:** Nuts, washers, and screws that secure the faucet to the sink or countertop.
Why Disassemble a Single Hole Faucet?
There are several reasons why you might need to disassemble a single-hole faucet:
* **Repairing Leaks:** Leaks are a common problem, often caused by a worn-out cartridge or O-rings. Disassembly allows you to identify and replace the faulty parts.
* **Replacing the Faucet:** If your faucet is severely damaged or outdated, disassembly is necessary to remove it for replacement.
* **Cleaning Mineral Deposits:** Over time, mineral deposits can build up inside the faucet, restricting water flow. Disassembly allows for thorough cleaning.
* **Replacing the Cartridge:** A faulty cartridge is a common cause of leaks and temperature control problems. Replacing it requires disassembly.
Essential Tools and Materials
Before you start learning **how to dis assemble single hole faucet**, gather the necessary tools and materials:
* **Basin Wrench:** Used to loosen and tighten the mounting nuts under the sink.
* **Adjustable Wrench:** For loosening and tightening various nuts and bolts.
* **Screwdrivers (Phillips and Flathead):** For removing screws.
* **Pliers:** For gripping and manipulating small parts.
* **Allen Wrench Set:** For removing set screws that hold the handle in place.
* **Penetrating Oil:** To loosen corroded or stuck parts.
* **White Vinegar:** For soaking and cleaning mineral deposits.
* **New Cartridge or Replacement Parts:** If you’re repairing a leak, have the necessary replacement parts on hand.
* **Clean Rags or Towels:** To protect the sink and wipe up spills.
* **Flashlight:** To illuminate the work area under the sink.
* **Safety Glasses:** To protect your eyes from debris.
* **Gloves:** To protect your hands.
Step-by-Step Guide: How to Disassemble a Single Hole Faucet
Follow these steps carefully to safely and effectively **how to dis assemble single hole faucet**:
Step 1: Shut Off the Water Supply
* Locate the shut-off valves under the sink. There should be one for hot water and one for cold water.
* Turn both valves clockwise until they are completely closed.
* Turn on the faucet to relieve any remaining pressure in the lines. If no water comes out, you’ve successfully shut off the water supply.
Step 2: Disconnect the Water Supply Lines
* Place a bucket or towel under the sink to catch any residual water.
* Use an adjustable wrench to loosen the nuts connecting the supply lines to the faucet tailpieces.
* Carefully disconnect the supply lines from the faucet. Be prepared for a small amount of water to spill out.
* Inspect the supply lines for wear and tear. If they are old or damaged, consider replacing them.
Step 3: Loosen the Mounting Hardware
* This is often the most challenging part, especially if the faucet has been in place for a long time.
* Use a basin wrench to loosen the mounting nuts that secure the faucet to the sink or countertop. Basin wrenches are designed to reach into tight spaces under the sink.
* Apply penetrating oil to the nuts if they are corroded or stuck. Let the oil soak in for a few minutes before attempting to loosen them.
* Once the nuts are loose, carefully remove them and any washers or brackets.
Step 4: Remove the Faucet from the Sink
* With the mounting hardware removed, you should be able to lift the faucet up and out of the sink.
* If the faucet is stuck, gently rock it back and forth to break any seals or adhesive.
* Be careful not to damage the sink or countertop during removal.
Step 5: Disassemble the Faucet Body
* Now that the faucet is removed, you can begin disassembling the faucet body.
* **Locate and Remove the Handle:** Most single-hole faucets have a set screw that holds the handle in place. Use an Allen wrench to loosen the set screw and remove the handle. Some handles simply pull off.
* **Remove the Decorative Cap or Cover:** Underneath the handle, there may be a decorative cap or cover that needs to be removed to access the cartridge. Use a flathead screwdriver to gently pry off the cap.
* **Remove the Cartridge Retaining Clip or Nut:** The cartridge is held in place by a retaining clip or nut. Use pliers or an adjustable wrench to remove the clip or nut.
* **Remove the Cartridge:** Once the retaining clip or nut is removed, you should be able to pull the cartridge straight up and out of the faucet body. If the cartridge is stuck, gently wiggle it back and forth while pulling.
* **Inspect the Cartridge:** Examine the cartridge for signs of wear or damage, such as cracks, chips, or mineral deposits. If the cartridge is damaged, it needs to be replaced.
Step 6: Clean and Inspect the Faucet Components
* Clean all of the faucet components with white vinegar to remove mineral deposits. Use a soft brush or cloth to scrub away any stubborn deposits.
* Inspect all of the O-rings and seals for wear or damage. Replace any worn or damaged O-rings.
* Check the faucet body for cracks or corrosion. If the faucet body is damaged, it may need to be replaced.
Troubleshooting Common Issues
Even with careful planning, issues can arise when learning **how to dis assemble single hole faucet**. Here are some common problems and how to address them:
* **Stuck Mounting Nuts:** Apply penetrating oil and let it soak in for several hours. Use a basin wrench with a long handle for extra leverage. If all else fails, you may need to cut the nuts off with a hacksaw.
* **Stuck Cartridge:** Gently wiggle the cartridge back and forth while pulling. Use pliers to grip the cartridge and apply more force. If the cartridge is still stuck, try using a cartridge puller tool.
* **Broken Screws:** Use a screw extractor to remove the broken screw. If the screw is deeply embedded, you may need to drill it out.
* **Leaks After Reassembly:** Double-check that all of the O-rings and seals are properly installed. Make sure that the cartridge is fully seated in the faucet body. Tighten all of the connections securely.
Choosing the Right Replacement Parts
When replacing parts during **how to dis assemble single hole faucet**, it’s crucial to select the correct replacements. Here’s what to consider:
* **Cartridge Compatibility:** Ensure the new cartridge matches the make and model of your faucet. Bring the old cartridge to the hardware store for comparison.
* **O-Ring Size:** Measure the old O-rings to ensure the new ones are the correct size. O-rings that are too small or too large will not seal properly.
* **Material Quality:** Choose replacement parts made from durable materials, such as brass or stainless steel. Avoid plastic parts, which are more prone to breakage.
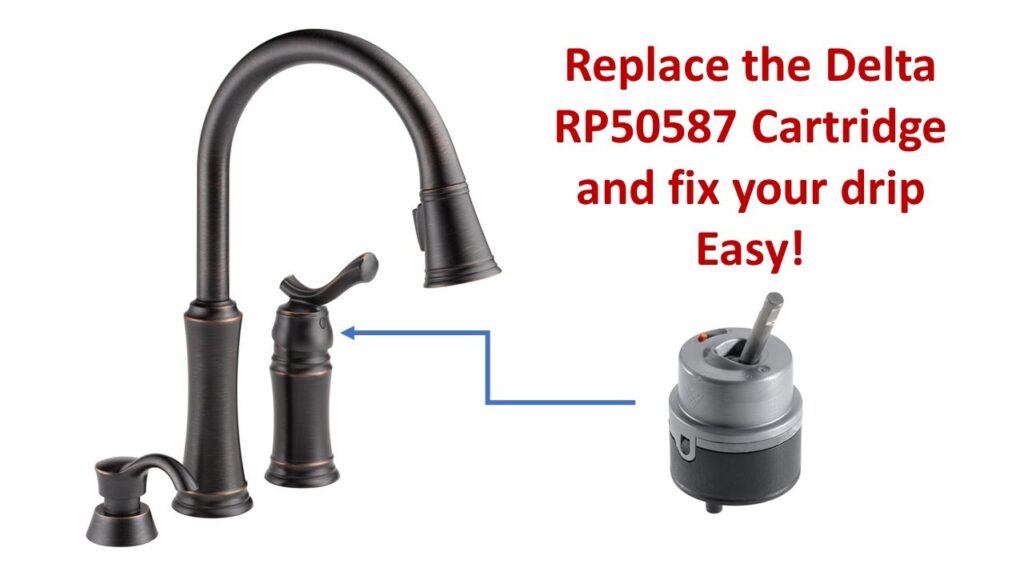
The Delta Faucet: A Case Study in Single Hole Disassembly
Delta faucets are a popular choice for single-hole installations. Their design emphasizes both aesthetics and functionality. Disassembling a Delta single-hole faucet involves similar steps to those outlined above, but some specific features warrant attention.
Delta’s proprietary Diamond Seal Technology often incorporates a ceramic disc cartridge known for its durability. When disassembling a Delta faucet to replace this cartridge, be extremely careful not to scratch or damage the ceramic surfaces. Even minor imperfections can lead to leaks.
Furthermore, Delta faucets often feature a unique handle attachment mechanism. Before attempting to remove the handle, consult the specific model’s documentation to identify the correct method, whether it involves a set screw, a push-button release, or another design. Forcing the handle can damage the faucet body.
Understanding these nuances specific to Delta faucets demonstrates the importance of researching your particular model before attempting disassembly.
American Standard Faucets: Another Common Type
American Standard is another major manufacturer of single-hole faucets. Their faucets often feature a different cartridge design compared to Delta, typically using a brass or plastic cartridge with rubber seals. When disassembling an American Standard faucet, pay close attention to the orientation of the cartridge and the rubber seals. Make a note of how the parts fit together before removing them, as this will make reassembly easier.
American Standard faucets may also have a different type of aerator. Some aerators are threaded and can be unscrewed with pliers, while others are held in place by a small clip. Be careful when removing the aerator, as the clip can be easily lost.
Benefits of Disassembling a Single Hole Faucet Yourself
While calling a plumber is always an option, learning **how to dis assemble single hole faucet** offers several advantages:
* **Cost Savings:** You’ll save money on labor costs.
* **Convenience:** You can fix the problem on your own schedule.
* **Knowledge:** You’ll gain a better understanding of how your faucet works.
* **Satisfaction:** You’ll feel a sense of accomplishment from completing the repair yourself.
Potential Drawbacks and When to Call a Professional
Despite the benefits, there are potential drawbacks to DIY disassembly:
* **Risk of Damage:** You could damage the faucet or plumbing if you’re not careful.
* **Time Commitment:** It can take several hours to disassemble and repair a faucet, especially if you’re not experienced.
* **Complexity:** Some faucet repairs are more complex than others and may require specialized tools or knowledge.
Consider calling a professional plumber if:
* You’re not comfortable working with plumbing.
* You’re unable to identify the source of the leak.
* You’re having trouble disassembling the faucet.
* The faucet is severely damaged.
* You encounter any unexpected plumbing problems.
Expert Review of Single Hole Faucet Disassembly
Disassembling a single-hole faucet is generally a straightforward task, but it requires patience, attention to detail, and the right tools. Our experience shows that the most common mistakes are related to improper water shut-off, difficulty removing stuck mounting nuts, and damaging the cartridge during removal.
**Usability:** The process is relatively simple, but it can be physically demanding, especially when working in tight spaces under the sink. A basin wrench is essential for loosening the mounting nuts, and penetrating oil can be a lifesaver for corroded parts.
**Performance:** When performed correctly, disassembling a single-hole faucet allows for thorough cleaning, repair, and replacement of worn parts, restoring the faucet to its original functionality.
**Pros:**
* Saves money on professional plumbing services.
* Allows for thorough cleaning and maintenance of the faucet.
* Provides an opportunity to learn about the inner workings of the faucet.
* Empowers homeowners to tackle simple plumbing repairs themselves.
* Extends the lifespan of the faucet.
**Cons:**
* Can be challenging for beginners.
* Requires specialized tools.
* Risk of damaging the faucet or plumbing.
* Time-consuming.
* May not be suitable for all faucet repairs.
**Ideal User Profile:** This task is best suited for homeowners who are comfortable with basic DIY projects and have some experience working with tools. It’s also a good option for those who are looking to save money on professional plumbing services.
**Alternatives:**
* **Professional Plumber:** A plumber can quickly and efficiently disassemble and repair your faucet. However, this is the most expensive option.
* **Handyman:** A handyman may be able to disassemble and repair your faucet for a lower cost than a plumber. However, make sure that the handyman is experienced in plumbing repairs.
**Overall Verdict:** Disassembling a single-hole faucet is a worthwhile DIY project for homeowners who are comfortable with basic plumbing repairs. However, it’s important to proceed with caution and to call a professional if you encounter any difficulties.
Frequently Asked Questions (Q&A)
Here are some frequently asked questions about **how to dis assemble single hole faucet**:
**Q1: How do I know if my faucet cartridge needs to be replaced?**
A1: Common signs include dripping faucet, difficulty controlling water temperature, and a stiff or difficult-to-turn handle. If you experience any of these issues, replacing the cartridge is often the solution.
**Q2: Can I reuse the old O-rings when reassembling the faucet?**
A2: It’s generally not recommended. O-rings can become brittle and lose their elasticity over time, leading to leaks. It’s best to replace them with new ones.
**Q3: What is the best way to remove mineral deposits from faucet components?**
A3: Soaking the components in white vinegar for several hours is an effective way to dissolve mineral deposits. Use a soft brush or cloth to scrub away any stubborn deposits.
**Q4: How do I prevent the mounting nuts from getting stuck in the future?**
A4: Apply a thin layer of plumber’s grease to the threads of the mounting nuts before installing the faucet. This will help prevent corrosion and make it easier to remove the nuts in the future.
**Q5: What should I do if I break a screw while disassembling the faucet?**
A5: Use a screw extractor to remove the broken screw. If the screw is deeply embedded, you may need to drill it out. Be careful not to damage the faucet body.
**Q6: Is it necessary to turn off the water supply before disassembling the faucet?**
A6: Yes, it’s absolutely essential to turn off the water supply before disassembling the faucet. Otherwise, you’ll have a major water leak.
**Q7: How can I identify the correct replacement cartridge for my faucet?**
A7: The easiest way is to bring the old cartridge to a hardware store or plumbing supply store. The staff can help you find a matching replacement. Alternatively, check the faucet manufacturer’s website for parts diagrams.
**Q8: What type of grease should I use on faucet components?**
A8: Use plumber’s grease, which is a non-toxic, waterproof grease specifically designed for plumbing applications. Avoid using petroleum-based grease, as it can damage rubber seals.
**Q9: How do I prevent scratching the sink or countertop while disassembling the faucet?**
A9: Place a towel or cloth over the sink or countertop to protect it from scratches. Be careful when using tools, and avoid dropping them on the surface.
**Q10: What should I do if I can’t find replacement parts for my faucet?**
A10: If you can’t find replacement parts, you may need to replace the entire faucet. However, before doing so, try contacting the faucet manufacturer directly. They may be able to provide you with the parts you need.
Conclusion
Mastering **how to dis assemble single hole faucet** empowers you to tackle common plumbing repairs, saving time and money. This comprehensive guide has provided the knowledge and steps necessary for successful disassembly, troubleshooting, and reassembly. Remember to prioritize safety, use the right tools, and take your time. While DIY repairs are rewarding, don’t hesitate to consult a professional plumber for complex issues. By following these guidelines, you’ll be well-equipped to maintain and repair your single-hole faucet, ensuring its longevity and optimal performance. Share your experiences with single hole faucet disassembly in the comments below!

