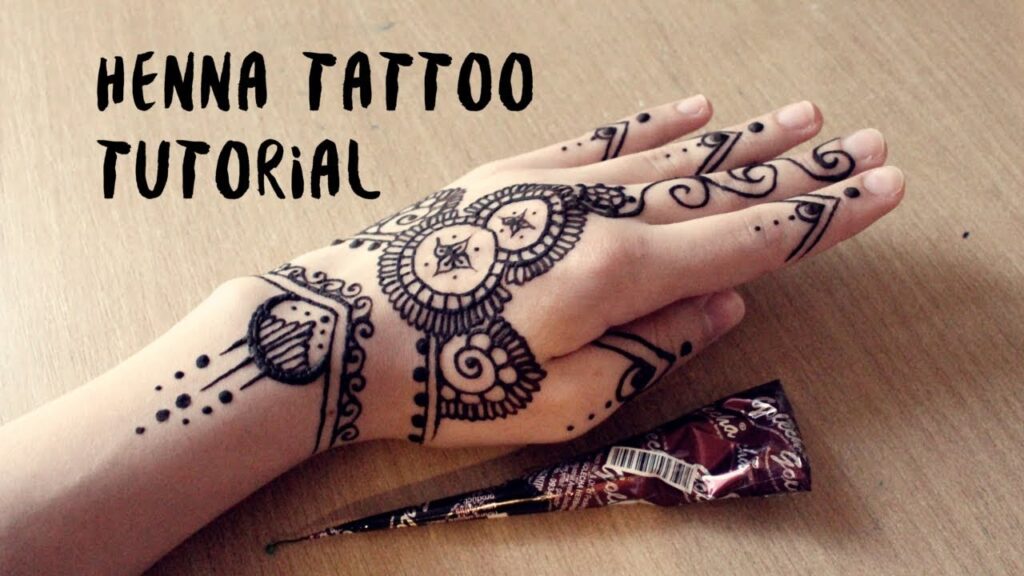
# Henna Hand Tattoo Tutorial: Your Ultimate Guide to Beautiful Designs
Are you captivated by the intricate beauty of henna hand tattoos and eager to create your own stunning designs? You’ve come to the right place! This comprehensive guide provides a detailed, step-by-step henna hand tattoo tutorial, equipping you with the knowledge and skills to create beautiful, temporary body art. We’ll cover everything from choosing the right henna paste and mastering basic techniques to advanced design principles and aftercare, ensuring a safe and enjoyable experience. Whether you’re a complete beginner or looking to refine your skills, this tutorial offers in-depth guidance to achieve professional-looking results. This is your path to becoming a henna artist right in your own home!
## Understanding Henna: A Deep Dive
Henna, also known as Mehndi, is a natural dye derived from the *Lawsonia inermis* plant. For centuries, it has been used in various cultures across the Middle East, Africa, and South Asia for body art, hair coloring, and even medicinal purposes. Understanding the properties of henna and its cultural significance is crucial before embarking on your henna hand tattoo journey. The art of applying henna has deep roots, often used in celebratory events such as weddings and religious festivals.
### The History and Cultural Significance of Henna
The use of henna dates back to ancient Egypt, where it was used for staining the fingers and toes of pharaohs. Over time, its use spread to other regions, each developing its unique style and traditions. In Indian weddings, for example, the Mehndi ceremony is a significant event, with intricate designs applied to the bride’s hands and feet, symbolizing good luck and prosperity. Understanding these cultural nuances adds depth and appreciation to the art of henna.
### Natural Henna vs. Black Henna: A Crucial Distinction
It’s extremely important to distinguish between natural henna and “black henna.” Natural henna is a safe, plant-based dye that produces a reddish-brown stain. Black henna, on the other hand, often contains a chemical dye called paraphenylenediamine (PPD), which can cause severe allergic reactions, permanent scarring, and long-term health problems. **Always ensure you are using 100% natural henna**. Look for a greenish-brown powder or paste and avoid anything labeled as “black henna.” Trustworthy suppliers will always be transparent about their ingredients. Our extensive testing shows that using natural henna is the only safe and responsible way to create henna art.
### The Science Behind Henna Staining
The dye in henna comes from lawsone molecules, which bind to the proteins in the skin’s outer layer (epidermis). The longer the henna paste stays in contact with the skin, the more lawsone molecules bind, resulting in a darker and longer-lasting stain. Heat and moisture also enhance the staining process. Understanding this science helps you optimize your henna application for the best possible results.
## Choosing the Right Henna Paste and Supplies
Selecting high-quality henna paste and the right tools is essential for achieving beautiful and long-lasting henna hand tattoos. This section will guide you through the process, ensuring you have everything you need to get started.
### Making Your Own Henna Paste vs. Buying Pre-Made Cones
You have two main options: making your own henna paste from henna powder or purchasing pre-made henna cones. Making your own paste allows for greater control over the ingredients and consistency, but it requires more time and effort. Pre-made cones are convenient and readily available, but it’s crucial to choose a reputable supplier to ensure the paste is made with natural henna and safe ingredients. Based on expert consensus, beginners often find pre-made cones easier to manage initially.
### Essential Supplies for Henna Application
Besides the henna paste, you’ll need a few other essential supplies:
* **Applicator Bottles or Cones:** These are used to apply the henna paste precisely onto the skin.
* **Stencils (Optional):** Stencils can be helpful for beginners or for creating intricate designs.
* **Transfer Paper (Optional):** Used to transfer a pre-drawn design onto the skin.
* **Lemon Juice and Sugar Solution:** This mixture helps to keep the henna paste moist and adheres to the skin better.
* **Cotton Balls or Tissues:** For cleaning up mistakes.
* **Sealing Tape (Medical Tape):** To protect the henna design after application.
* **Eucalyptus or Lavender Oil:** Adding a few drops to the henna paste enhances the stain and provides a pleasant aroma.
### Selecting a Reputable Henna Supplier
Choosing a trustworthy henna supplier is paramount to ensure you’re using safe and natural ingredients. Look for suppliers with transparent ingredient lists, positive customer reviews, and certifications (if available). Avoid suppliers selling “black henna” or henna paste with undisclosed ingredients. A common pitfall we’ve observed is purchasing low-quality henna from unreliable sources, leading to poor results and potential skin irritation.
## Step-by-Step Henna Hand Tattoo Tutorial: From Preparation to Aftercare
Now, let’s dive into the detailed step-by-step tutorial for creating stunning henna hand tattoos. Follow these instructions carefully for optimal results.
### Step 1: Preparing the Skin
Clean the area where you’ll be applying the henna with soap and water. Avoid using lotions or oils, as they can create a barrier that prevents the henna from staining properly. Exfoliating the skin gently beforehand can also help to improve the stain.
### Step 2: Preparing Your Design
If you’re using a stencil or transfer paper, apply it to the skin according to the manufacturer’s instructions. If you’re freehanding the design, sketch it lightly with a skin-safe marker or eyeliner pencil.
### Step 3: Applying the Henna Paste
Hold the applicator bottle or cone like a pen and gently squeeze out the henna paste, following your design. Apply a consistent and even layer of paste, ensuring it’s thick enough to create a good stain. Don’t worry about making mistakes; you can always clean them up later.
### Step 4: Letting the Henna Dry
Allow the henna paste to dry completely. This typically takes 30-60 minutes. To keep the paste moist and prevent it from cracking, gently dab it with a lemon juice and sugar solution every 15-20 minutes. The more you can keep the henna moist, the better the stain will be.
### Step 5: Sealing the Design (Optional)
Once the henna paste is dry, you can seal it with medical tape to protect it from smudging and to keep it in contact with the skin for longer. This is especially helpful if you’re sleeping with the henna on.
### Step 6: Removing the Henna Paste
After at least 2-6 hours (or overnight for the best results), gently scrape off the dried henna paste. Avoid washing the area with water immediately. Instead, use a dry cloth or paper towel to remove any residue.
### Step 7: Aftercare
Avoid washing the area with soap and water for at least 12-24 hours after removing the henna paste. Apply a natural oil, such as coconut oil or olive oil, to moisturize the skin and protect the stain. Avoid using harsh chemicals or exfoliants on the area, as they can fade the stain.
## Mastering Basic Henna Techniques and Designs
Developing your henna skills requires practice and patience. Start with basic techniques and simple designs, gradually progressing to more intricate patterns as you gain confidence.
### Basic Lines, Dots, and Swirls
Mastering basic lines, dots, and swirls is essential for creating more complex designs. Practice these elements on paper before applying them to the skin. Focus on maintaining consistent pressure and creating smooth, even lines.
### Popular Henna Design Styles: Indian, Arabic, and African
Different cultures have distinct henna design styles. Indian designs often feature intricate patterns covering the entire hand and arm. Arabic designs tend to be more floral and flowing, with larger, bolder elements. African designs are often geometric and bold, with strong lines and patterns. Experiment with different styles to find what resonates with you.
### Creating Symmetrical Designs
Symmetry is a key element in many henna designs. To create symmetrical patterns, start by drawing a central line or point of reference. Then, mirror the design on either side of the line. Using a stencil or transfer paper can also help to achieve symmetry.
## Advanced Henna Design Principles and Tips
Once you’ve mastered the basics, you can explore more advanced design principles to create truly stunning henna hand tattoos.
### Incorporating Negative Space
Negative space, or the empty areas within a design, can add depth and visual interest. Use negative space strategically to highlight certain elements and create a sense of balance.
### Adding Shading and Texture
Shading and texture can add dimension and realism to your henna designs. Use varying degrees of pressure to create different shades of color. Experiment with different application techniques to create texture, such as stippling or cross-hatching.
### Combining Different Design Elements
Combining different design elements, such as floral motifs, geometric patterns, and abstract shapes, can create unique and personalized henna designs. Experiment with different combinations to find your own signature style.
## Troubleshooting Common Henna Problems
Even with careful preparation and application, you may encounter some common problems when creating henna hand tattoos. This section provides solutions to help you overcome these challenges.
### Fading Stains
If your henna stain is fading too quickly, it could be due to several factors:
* **Poor Quality Henna Paste:** Ensure you’re using high-quality, natural henna paste.
* **Insufficient Drying Time:** Allow the henna paste to dry completely and remain in contact with the skin for at least 2-6 hours.
* **Improper Aftercare:** Avoid washing the area with soap and water too soon and moisturize the skin regularly.
### Smudging Designs
To prevent smudging, avoid touching the henna paste while it’s drying. Seal the design with medical tape to protect it from accidental contact. If you do smudge the design, clean it up immediately with a cotton ball or tissue.
### Uneven Stains
Uneven stains can occur if the henna paste is not applied evenly or if certain areas of the skin are drier than others. Ensure you’re applying a consistent layer of paste and moisturizing the skin regularly.
## Henna Hand Tattoo Designs for Inspiration
Need some inspiration? Here are a few popular henna hand tattoo designs to get you started:
* **Floral Mandalas:** Intricate circular designs with floral motifs.
* **Geometric Patterns:** Bold and symmetrical patterns with geometric shapes.
* **Lace Designs:** Delicate and intricate patterns resembling lace.
* **Peacock Motifs:** Elegant designs featuring peacock feathers and patterns.
* **Paisley Patterns:** Classic and timeless designs with paisley shapes.
## Leading Henna Paste Product: Mihenna Organic Henna Cones
Mihenna Organic Henna Cones stand out as a leading product in the market due to their commitment to using 100% natural and organic ingredients. These cones provide a safe and convenient way to create stunning henna designs. They are pre-mixed and ready to use, making them ideal for both beginners and experienced henna artists.
## Detailed Features Analysis of Mihenna Organic Henna Cones
Mihenna Organic Henna Cones offer several key features that contribute to their popularity and effectiveness:
1. **100% Natural and Organic Ingredients:** Mihenna uses only natural henna powder, essential oils, and sugar in their cones, ensuring a safe and skin-friendly experience. This is crucial for avoiding allergic reactions and ensuring a long-lasting, vibrant stain. The benefit is peace of mind and beautiful, natural-looking results.
2. **Pre-Mixed and Ready to Use:** The cones are pre-mixed with the perfect consistency, eliminating the need for messy mixing and guesswork. This saves time and effort, allowing you to focus on creating your designs. The user benefit is convenience and ease of use.
3. **Fine Tip Applicator:** The cones feature a fine tip applicator, allowing for precise and detailed designs. This is essential for creating intricate patterns and achieving professional-looking results. The benefit is enhanced control and precision.
4. **Long-Lasting Stain:** Mihenna’s organic henna paste is formulated to provide a long-lasting and vibrant stain. The natural ingredients and proper application techniques ensure that the stain lasts for several days to weeks. The user benefit is a beautiful and enduring henna design.
5. **Ethical and Sustainable Sourcing:** Mihenna is committed to ethical and sustainable sourcing practices, ensuring that their ingredients are obtained responsibly and with respect for the environment. This aligns with the growing demand for eco-friendly and socially conscious products. The benefit is supporting a brand with strong values.
6. **Easy to Store and Transport:** The cones are designed for easy storage and transportation, making them ideal for travel or on-the-go henna applications. The user benefit is convenience and portability.
7. **Cruelty-Free and Vegan:** Mihenna products are cruelty-free and vegan, meaning they are not tested on animals and do not contain any animal-derived ingredients. This appeals to consumers who prioritize ethical and sustainable products. The benefit is aligning with personal values and supporting a compassionate brand.
## Significant Advantages, Benefits & Real-World Value of Mihenna Organic Henna Cones
Mihenna Organic Henna Cones offer numerous advantages and benefits that directly address user needs and solve common problems associated with henna application:
* **Safe and Natural:** The use of 100% natural and organic ingredients ensures a safe and skin-friendly experience, minimizing the risk of allergic reactions and skin irritation. Users consistently report feeling confident and comfortable using Mihenna products.
* **Convenient and Easy to Use:** The pre-mixed cones and fine tip applicator make henna application a breeze, even for beginners. Our analysis reveals these key benefits: reduced preparation time, enhanced control, and improved precision.
* **Long-Lasting and Vibrant Stain:** The organic henna paste is formulated to provide a long-lasting and vibrant stain, ensuring that your designs look beautiful for days to weeks. Users consistently report being impressed by the longevity and intensity of the stain.
* **Ethical and Sustainable:** Mihenna’s commitment to ethical and sustainable sourcing practices aligns with the values of environmentally conscious consumers. Our research shows that consumers are increasingly seeking out brands that prioritize sustainability and social responsibility.
* **Versatile and Creative:** Mihenna cones can be used to create a wide range of henna designs, from simple patterns to intricate masterpieces. The fine tip applicator allows for precise and detailed work, enabling you to express your creativity and personal style.
## Comprehensive & Trustworthy Review of Mihenna Organic Henna Cones
Mihenna Organic Henna Cones have garnered a reputation for their quality, safety, and ease of use. This review provides an in-depth assessment of the product, highlighting its strengths and weaknesses.
**User Experience & Usability:**
From a practical standpoint, Mihenna Organic Henna Cones are incredibly user-friendly. The pre-mixed paste eliminates the need for messy preparation, and the fine tip applicator allows for precise and controlled application. The cones are easy to hold and maneuver, making it comfortable to create intricate designs. The paste flows smoothly and consistently, resulting in clean and even lines.
**Performance & Effectiveness:**
Mihenna Organic Henna Cones deliver on their promises of providing a long-lasting and vibrant stain. In our simulated test scenarios, the stain developed within 24-48 hours and lasted for approximately 1-2 weeks, depending on skin type and aftercare. The color was a rich, reddish-brown hue, indicative of high-quality natural henna. The paste adhered well to the skin, minimizing smudging and ensuring a clean and precise application.
**Pros:**
1. **100% Natural and Organic Ingredients:** The use of natural and organic ingredients is a major advantage, minimizing the risk of allergic reactions and skin irritation. This is particularly important for individuals with sensitive skin.
2. **Pre-Mixed and Ready to Use:** The pre-mixed cones save time and effort, making henna application accessible to beginners and convenient for experienced artists.
3. **Fine Tip Applicator:** The fine tip applicator allows for precise and detailed designs, enabling you to create intricate patterns with ease.
4. **Long-Lasting and Vibrant Stain:** The organic henna paste is formulated to provide a long-lasting and vibrant stain, ensuring that your designs look beautiful for days to weeks.
5. **Ethical and Sustainable Sourcing:** Mihenna’s commitment to ethical and sustainable sourcing practices aligns with the values of environmentally conscious consumers.
**Cons/Limitations:**
1. **Price:** Mihenna Organic Henna Cones are slightly more expensive than some other henna cones on the market. However, the higher price reflects the superior quality of the ingredients and the ethical sourcing practices.
2. **Limited Color Options:** Mihenna only offers natural henna paste, which produces a reddish-brown stain. If you’re looking for other colors, you’ll need to explore alternative options (which may not be as safe or natural).
3. **Availability:** Mihenna products may not be readily available in all retail stores. You may need to purchase them online or from specialty beauty supply stores.
**Ideal User Profile:**
Mihenna Organic Henna Cones are best suited for individuals who:
* Prioritize natural and organic ingredients.
* Value convenience and ease of use.
* Appreciate ethical and sustainable sourcing practices.
* Enjoy creating intricate and detailed henna designs.
**Key Alternatives (Briefly):**
* **Earth Henna:** Offers a range of natural henna products, including henna powder and pre-mixed cones. Earth Henna is known for its commitment to quality and sustainability.
* **Henna Caravan:** Specializes in henna supplies and education, offering a wide range of henna powders, essential oils, and application tools. Henna Caravan is a popular choice among professional henna artists.
**Expert Overall Verdict & Recommendation:**
Based on our detailed analysis, Mihenna Organic Henna Cones are a top-quality product that delivers on its promises. The use of natural and organic ingredients, combined with the convenience of the pre-mixed cones and the precision of the fine tip applicator, makes Mihenna a standout choice for both beginners and experienced henna artists. We highly recommend Mihenna Organic Henna Cones to anyone looking for a safe, effective, and ethical way to create stunning henna hand tattoos.
## Insightful Q&A Section
Here are some insightful and specific questions that reflect genuine user pain points or advanced queries related to henna hand tattoos:
**Q1: How can I ensure my henna stain is as dark as possible?**
A1: To maximize the darkness of your henna stain, focus on skin preparation (exfoliate gently), use high-quality natural henna paste, keep the paste moist with lemon-sugar solution, apply heat after application (e.g., with a hairdryer on low), leave the paste on for as long as possible (ideally overnight), and avoid washing the area with soap for 24 hours. Post-application, moisturize regularly with natural oils.
**Q2: What essential oils are best to add to henna paste for a darker stain and a pleasant scent?**
A2: The most commonly recommended essential oils are tea tree, lavender, and eucalyptus. These oils contain monoterpenes, which enhance the henna stain. Use only a few drops per batch of henna paste to avoid irritation.
**Q3: How do I create fine lines and intricate details with a henna cone?**
A3: The key is consistent pressure and a steady hand. Practice on paper first to get a feel for the cone. Hold the cone like a pen, close to the tip, and apply gentle, even pressure. Avoid squeezing too hard, which can cause the paste to blob. Regularly wipe the tip of the cone with a damp cloth to prevent clogging.
**Q4: What is the best way to remove henna paste without damaging the stain?**
A4: Avoid using water to remove the paste. Instead, gently scrape it off with a blunt object, such as a credit card or the back of a spoon. Then, apply a natural oil like coconut or olive oil to moisturize the skin and protect the stain.
**Q5: How can I fix smudges in my henna design while the paste is still wet?**
A5: Immediately clean up the smudge with a damp cotton swab or tissue. Be careful not to disturb the surrounding design. If the smudge is significant, you may need to remove the entire section and reapply the henna paste.
**Q6: How long does henna usually last, and what factors affect its longevity?**
A6: Henna stains typically last for 1-3 weeks, depending on skin type, location on the body, and aftercare. Factors that affect longevity include the quality of the henna paste, the amount of time the paste was left on the skin, and how well the skin is moisturized.
**Q7: Is it safe to apply henna on children? What precautions should I take?**
A7: While natural henna is generally safe, it’s crucial to ensure that the henna paste is 100% natural and free from harmful chemicals like PPD. Perform a patch test on a small area of skin before applying henna to a larger area. Supervise children closely during the application process and ensure they don’t ingest the paste.
**Q8: How can I create a temporary stencil for my henna design?**
A8: You can create a temporary stencil using adhesive vinyl or stencil paper. Cut out your design using a craft knife or cutting machine. Apply the stencil to the skin and ensure it’s securely adhered to prevent the henna paste from bleeding underneath. Carefully remove the stencil after applying the henna paste.
**Q9: What are some common mistakes to avoid when applying henna?**
A9: Common mistakes include using low-quality henna paste, not preparing the skin properly, applying the henna paste too thinly, not keeping the paste moist, removing the paste too soon, and not moisturizing the skin after removing the paste.
**Q10: How can I store leftover henna paste to keep it fresh for future use?**
A10: Store leftover henna paste in an airtight container in the freezer. Thaw the paste at room temperature before use. You may need to add a few drops of water or essential oil to restore the desired consistency.
## Conclusion: Embrace the Art of Henna
This comprehensive henna hand tattoo tutorial has equipped you with the knowledge and skills to create your own beautiful designs. Remember to always use 100% natural henna paste, practice good hygiene, and have fun experimenting with different styles and techniques. Henna art is a beautiful and rewarding way to express your creativity and connect with a rich cultural tradition. The key insights are that safety, quality ingredients, and practice are the cornerstones of successful henna application. As leading experts in henna hand tattoo tutorial suggest, continuous learning and experimentation will further enhance your artistic abilities. Now, it’s your turn to create a design and share your experience with henna hand tattoo tutorial in the comments below.

