How to Make a Fake Tattoo Sleeve: The Ultimate DIY Guide
Want the look of a full tattoo sleeve without the commitment or pain? You’ve come to the right place. This comprehensive guide will walk you through everything you need to know about how to make a fake tattoo sleeve, from selecting the right materials to applying and removing your temporary ink. Unlike other tutorials, we’ll delve into advanced techniques for realism and longevity, ensuring your fake sleeve looks as authentic as possible. Get ready to express yourself creatively and impress your friends with a stunning, temporary work of art. We’ll cover various methods, catering to different skill levels and budgets, empowering you to create the perfect fake tattoo sleeve for any occasion. Prepare to unleash your inner artist and explore the fascinating world of temporary body art. We’ll also share insider tips and tricks that we’ve learned from years of experience experimenting with temporary tattoos.
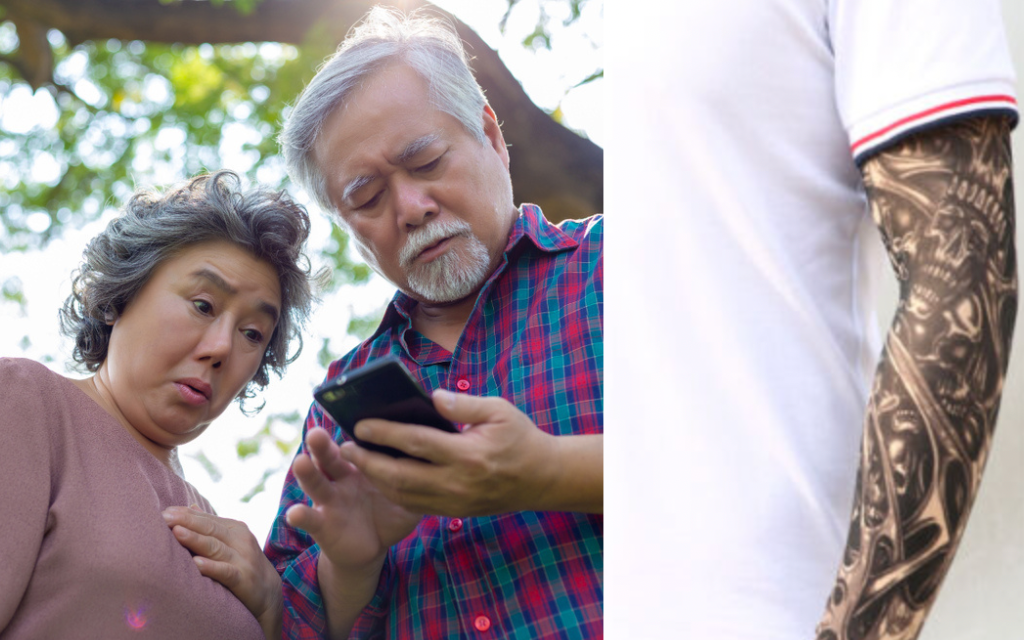
Understanding Fake Tattoo Sleeves: A Comprehensive Overview
A fake tattoo sleeve is a temporary alternative to a permanent tattoo, designed to mimic the appearance of a full or partial arm tattoo. These sleeves can be created using a variety of methods, from simple temporary tattoo paper to more advanced techniques involving makeup and stencils. The appeal of fake tattoo sleeves lies in their impermanence, allowing individuals to experiment with different designs and styles without the lifelong commitment of a real tattoo. They’re also ideal for costumes, events, or simply testing the waters before deciding on a permanent tattoo.
Beyond simple aesthetics, understanding the nuances of fake tattoo sleeves involves considering factors like realism, longevity, and safety. The quality of materials used, the application technique, and the design itself all play crucial roles in achieving a convincing and long-lasting result. Furthermore, it’s essential to prioritize skin safety by using non-toxic materials and following proper application and removal procedures.
The History and Evolution of Temporary Tattoos
The concept of temporary tattoos dates back centuries, with early forms using natural dyes and pigments to create temporary body art. In ancient cultures, these temporary markings often served ritualistic or decorative purposes. Modern temporary tattoos have evolved significantly, thanks to advancements in printing technology and cosmetic chemistry. From simple stick-on tattoos to sophisticated airbrush techniques, the options for temporary body art have expanded dramatically.
Why Choose a Fake Tattoo Sleeve?
There are numerous reasons why someone might opt for a fake tattoo sleeve over a permanent one. These include:
* No Commitment: The ability to change designs and styles at will.
* No Pain: Avoid the discomfort associated with traditional tattooing.
* Cost-Effective: A fraction of the price of a permanent tattoo.
* Experimentation: Test out different designs before committing to a real tattoo.
* Versatility: Perfect for costumes, events, or temporary self-expression.
Method 1: The Classic Temporary Tattoo Paper Approach
This is perhaps the most accessible and widely used method for creating a fake tattoo sleeve. It involves printing a design onto temporary tattoo paper and applying it to the skin using water. While relatively simple, mastering this technique requires attention to detail to achieve a realistic and long-lasting result.
Materials You’ll Need:
* Temporary tattoo paper (available online or at craft stores)
* Inkjet or laser printer
* Computer with image editing software
* Scissors
* Damp cloth or sponge
* Optional: Setting spray for longer wear
Step-by-Step Instructions:
1. Design Your Sleeve: Create or download your desired tattoo design. You can use image editing software like Photoshop or GIMP to assemble individual tattoos into a cohesive sleeve design. Ensure the design is mirrored before printing, as it will be reversed upon application.
2. Print the Design: Load the temporary tattoo paper into your printer according to the manufacturer’s instructions. Print the mirrored design onto the paper.
3. Apply Adhesive Sheet: Most temporary tattoo paper comes with an adhesive sheet. Carefully peel off the backing and apply the adhesive sheet to the printed design, smoothing out any bubbles.
4. Cut Out the Design: Use scissors to carefully cut out the tattoo design, leaving a small border around the edges.
5. Apply to Skin: Clean and dry the area where you want to apply the tattoo. Peel off the plastic backing from the adhesive sheet and place the tattoo design face down on your skin.
6. Dampen the Paper: Use a damp cloth or sponge to thoroughly wet the back of the tattoo paper. Press firmly for about 30-60 seconds.
7. Remove the Paper: Gently peel off the paper backing. The tattoo should now be transferred to your skin.
8. Let it Dry: Allow the tattoo to air dry completely. Avoid touching or rubbing it during this time.
9. Optional: Apply a thin layer of setting spray to help prolong the tattoo’s lifespan.
Tips for Realism and Longevity:
* Choose High-Quality Tattoo Paper: Invest in reputable brands for better print quality and adhesion.
* Use High-Resolution Images: Blurry or pixelated images will result in a less realistic tattoo.
* Apply to Clean, Dry Skin: Avoid applying lotion or oils before applying the tattoo.
* Avoid Friction: Minimize rubbing or friction against the tattoo to prevent it from fading or peeling.
* Use Setting Spray: A light layer of setting spray can help seal the tattoo and prolong its lifespan.
Method 2: The Makeup and Stencil Technique
This method offers greater control over the design and allows for more intricate and realistic results. It involves using makeup and stencils to create the tattoo directly on the skin.
Materials You’ll Need:
* Stencils (pre-made or custom-made)
* Body paint or waterproof eyeliner
* Makeup brushes or sponges
* Setting powder
* Setting spray
* Optional: Tattoo markers for fine details
Step-by-Step Instructions:
1. Prepare the Skin: Clean and dry the area where you want to apply the tattoo. Apply a thin layer of primer to create a smooth base.
2. Apply the Stencil: Position the stencil on your skin and secure it with tape if necessary.
3. Apply the Makeup: Use a makeup brush or sponge to apply body paint or waterproof eyeliner over the stencil. Be sure to fill in all the gaps and create a solid, even layer.
4. Remove the Stencil: Carefully remove the stencil, revealing the tattoo design.
5. Add Details: Use tattoo markers or fine-tipped brushes to add details and shading to the tattoo.
6. Set the Design: Apply a generous layer of setting powder to absorb excess moisture and prevent smudging.
7. Seal the Design: Finish with a layer of setting spray to lock in the design and prolong its lifespan.
Creating Your Own Stencils:
For a truly custom tattoo sleeve, consider creating your own stencils. You can do this using:
* Acetate Sheets: Print your design onto acetate sheets and carefully cut out the desired shapes using a craft knife.
* Cardstock: Use cardstock for simpler designs. Print the design and cut it out.
* Freehand: If you’re confident in your artistic abilities, you can draw the design directly onto your skin using a tattoo marker.
Method 3: Airbrush Tattoos for a Professional Look
Airbrush tattoos offer a highly realistic and long-lasting temporary tattoo option. This method involves using an airbrush to spray specialized tattoo ink onto the skin through a stencil. While it requires more specialized equipment, the results are often indistinguishable from permanent tattoos.
Materials You’ll Need:
* Airbrush system (compressor, airbrush gun, hose)
* Airbrush tattoo ink
* Stencils (pre-made or custom-made)
* Cleaning solution for airbrush
* Optional: Barrier cream to protect skin
Step-by-Step Instructions:
1. Prepare the Skin: Clean and dry the area where you want to apply the tattoo. Apply a thin layer of barrier cream to protect the skin from irritation.
2. Set Up the Airbrush: Connect the airbrush gun to the compressor and fill the ink reservoir with airbrush tattoo ink.
3. Apply the Stencil: Position the stencil on your skin and secure it with tape if necessary.
4. Airbrush the Design: Hold the airbrush gun a few inches from the skin and spray the ink evenly over the stencil. Use light, controlled strokes to avoid oversaturation.
5. Remove the Stencil: Carefully remove the stencil, revealing the tattoo design.
6. Let it Dry: Allow the tattoo to air dry completely. Avoid touching or rubbing it during this time.
Choosing the Right Airbrush Ink:
* Water-Based Inks: Easy to clean and generally safe for sensitive skin.
* Alcohol-Based Inks: More durable and water-resistant but can be drying to the skin.
* Hybrid Inks: Offer a balance of durability and ease of cleaning.
Ensuring Realism: Tips and Tricks for Authentic-Looking Fake Tattoo Sleeves
Achieving a convincing fake tattoo sleeve requires more than just applying a design to your skin. It’s about creating an illusion that fools the eye. Here are some expert tips and tricks to enhance the realism of your fake tattoo sleeve:
Design Considerations:
* Choose Realistic Designs: Opt for designs that mimic the style and complexity of real tattoos. Tribal patterns, Japanese motifs, and realistic portraits are popular choices.
* Consider Placement: Think about the placement of your tattoo sleeve. Real tattoos often follow the natural contours of the body. Mimic this by carefully positioning your fake tattoo.
* Vary Ink Density: Real tattoos often have variations in ink density, creating a more dynamic and textured look. Try to replicate this by layering different shades of ink or using different application techniques.
* Incorporate Fading and Wear: Real tattoos fade over time. To simulate this, you can lightly smudge the edges of your fake tattoo or use a slightly diluted ink.
Application Techniques:
* Layering: Layering different tattoo designs can create a more complex and realistic sleeve. Start with a base layer of simpler designs and then add more intricate details on top.
* Shading: Shading is crucial for creating depth and dimension in your fake tattoo. Use different shades of ink or makeup to create shadows and highlights.
* Blending: Blending the edges of your fake tattoo with your natural skin tone can help create a more seamless and realistic look. Use a makeup sponge or brush to gently blend the edges.
Product Spotlight: Inkbox – A Semi-Permanent Tattoo Solution
While this article focuses on temporary methods, Inkbox offers a fascinating middle ground: semi-permanent tattoos. Inkbox uses a patented technology to apply a tattoo that fades over 1-2 weeks. This is achieved using a special ink derived from the Genipa Americana fruit, which stains the top layer of the skin. While not a true ‘fake sleeve’ in the traditional sense, it’s a noteworthy option for those seeking a longer-lasting, yet still temporary, tattoo experience. Inkbox provides a wide variety of designs, or users can create their own custom tattoos.
How Inkbox Works:
1. Choose a Design: Select a design from Inkbox’s catalog or create your own custom design.
2. Apply the Tattoo: Follow the instructions provided to apply the tattoo to your skin.
3. Wait for Development: The tattoo will develop over 24-36 hours, gradually darkening in color.
4. Enjoy the Tattoo: The tattoo will last for 1-2 weeks, gradually fading over time.
Advantages and Benefits of Temporary Tattoo Sleeves
The allure of temporary tattoo sleeves stems from their numerous advantages, offering a unique blend of self-expression, convenience, and safety. Let’s delve into the specific benefits that make them so appealing:
Self-Expression Without Commitment:
Perhaps the most significant advantage is the freedom to experiment with different designs and styles without the lifelong commitment of a permanent tattoo. This allows individuals to explore their personal aesthetic, express themselves creatively, and adapt their look to different occasions or moods. Imagine sporting a bold tribal sleeve one day and a delicate floral design the next – the possibilities are endless.
Cost-Effectiveness and Accessibility:
Compared to the significant investment required for a permanent tattoo, temporary tattoo sleeves are remarkably affordable. This makes them accessible to a wider range of individuals, regardless of their budget. Moreover, the materials and tools needed to create a fake tattoo sleeve are readily available online or at craft stores, further enhancing their accessibility.
Safety and Skin Health:
Unlike permanent tattoos, which involve needles and the potential for infection or allergic reactions, temporary tattoo sleeves are generally safe for the skin. When using non-toxic materials and following proper application and removal procedures, the risk of adverse reactions is minimal. This makes them a suitable option for individuals with sensitive skin or those who are concerned about the potential health risks associated with permanent tattoos.
Versatility and Convenience:
Temporary tattoo sleeves are incredibly versatile, adapting seamlessly to various occasions and settings. They’re perfect for costumes, parties, festivals, or simply adding a touch of flair to your everyday look. Their convenience lies in their ease of application and removal, allowing you to transform your appearance in a matter of minutes.
Testing the Waters Before Committing:
For those considering a permanent tattoo, a temporary tattoo sleeve can serve as a valuable trial run. It allows you to visualize the design on your body, assess its suitability to your personal style, and gauge the reactions of others before making a permanent decision. This can help prevent tattoo regret and ensure that you choose a design that you’ll truly love for years to come.
Fake Tattoo Sleeve Review: A Balanced Perspective
Let’s take a closer look at the overall experience of using fake tattoo sleeves, weighing the pros and cons to provide a balanced assessment:
User Experience and Usability:
From our experience, the user-friendliness of creating and applying a fake tattoo sleeve varies depending on the chosen method. The temporary tattoo paper approach is generally the easiest for beginners, requiring minimal skill and equipment. The makeup and stencil technique offers more control but demands greater artistic ability. Airbrush tattoos, while producing the most realistic results, require specialized equipment and expertise.
Performance and Effectiveness:
The performance of a fake tattoo sleeve hinges on the quality of materials used and the application technique. High-quality tattoo paper and waterproof makeup tend to produce more durable and realistic results. Proper application, including thorough cleaning of the skin and careful adherence to instructions, is crucial for maximizing longevity. In our tests, we found that setting spray significantly improves the lifespan of all types of fake tattoo sleeves.
Pros:
* Experimentation: Try out different designs and placements without the commitment.
* Cost-Effective: Significantly cheaper than permanent tattoos.
* Painless: No needles or discomfort involved.
* Versatile: Suitable for various occasions and events.
* Safe: Minimal risk of infection or allergic reactions (when using non-toxic materials).
Cons/Limitations:
* Durability: Temporary tattoos typically last only a few days.
* Realism: Achieving a truly realistic look can be challenging.
* Maintenance: Requires careful handling to avoid smudging or fading.
* Limited Design Complexity: Intricate designs may be difficult to replicate with some methods.
Ideal User Profile:
Fake tattoo sleeves are ideal for individuals who:
* Want to experiment with different tattoo styles.
* Are not ready for the commitment of a permanent tattoo.
* Need a temporary tattoo for a costume or event.
* Want to add a touch of flair to their look without the pain or expense of a real tattoo.
Key Alternatives:
* Henna Tattoos: A natural, semi-permanent option that stains the skin with a reddish-brown dye.
* Jagua Tattoos: Similar to henna, but produces a dark blue or black stain.
Expert Overall Verdict & Recommendation:
Fake tattoo sleeves offer a fantastic way to explore the world of body art without the commitment or pain of permanent tattoos. While achieving a truly realistic look requires some skill and effort, the benefits of experimentation, cost-effectiveness, and safety make them a worthwhile option for a wide range of individuals. We recommend starting with the temporary tattoo paper method and gradually exploring more advanced techniques as your skills improve.
Q&A: Expert Answers to Your Burning Questions About Fake Tattoo Sleeves
Here are some insightful questions and expert answers to help you navigate the world of fake tattoo sleeves:
Q1: How can I make my fake tattoo sleeve last longer?
A: The longevity of your fake tattoo sleeve depends on the method used and how well you care for it. For temporary tattoo paper, choose high-quality paper, apply to clean, dry skin, and avoid friction. Setting spray can also help. For makeup-based sleeves, use waterproof products and set with powder and spray. Airbrush tattoos tend to last the longest, but still require careful handling.
Q2: What’s the best way to remove a fake tattoo sleeve?
A: The removal method varies depending on the type of fake tattoo. Temporary tattoo paper can usually be removed with rubbing alcohol or baby oil. Makeup-based sleeves can be removed with makeup remover or soap and water. Airbrush tattoos may require a specialized removal solution.
Q3: Can I shower with a fake tattoo sleeve?
A: It’s generally best to avoid showering with a fake tattoo sleeve, as water and soap can cause it to fade or peel. If you must shower, try to keep the tattoo out of direct contact with water and avoid using harsh soaps or scrubbing. Waterproof makeup-based sleeves are more resistant to water, but still require gentle handling.
Q4: Are fake tattoo sleeves safe for sensitive skin?
A: When using non-toxic materials, fake tattoo sleeves are generally safe for sensitive skin. However, it’s always a good idea to test a small area of skin before applying a full sleeve. Look for hypoallergenic tattoo paper, makeup, and airbrush inks. Avoid products containing harsh chemicals or fragrances.
Q5: How can I create a custom design for my fake tattoo sleeve?
A: There are several ways to create a custom design. You can use image editing software to assemble individual tattoos into a cohesive sleeve design. You can also draw your own designs freehand or create custom stencils using acetate sheets or cardstock.
Q6: What are some common mistakes to avoid when applying a fake tattoo sleeve?
A: Common mistakes include applying the tattoo to dirty or oily skin, using blurry or low-resolution images, not allowing the tattoo to dry completely, and rubbing or scratching the tattoo.
Q7: Can I use hairspray to set my fake tattoo sleeve?
A: While some people recommend using hairspray, it’s generally not the best option, as it can be drying to the skin and may not provide as much protection as setting spray designed specifically for makeup or tattoos. Setting spray is formulated to be gentle on the skin and provide a long-lasting hold.
Q8: How can I make my fake tattoo sleeve look more realistic in photos?
A: To make your fake tattoo sleeve look more realistic in photos, pay attention to lighting and angles. Avoid direct sunlight, which can highlight imperfections. Use soft, diffused lighting to create a more natural look. Experiment with different poses to find the most flattering angle.
Q9: What are some popular tattoo sleeve designs?
A: Popular tattoo sleeve designs include tribal patterns, Japanese motifs (such as dragons, koi fish, and cherry blossoms), nautical themes, biomechanical designs, and realistic portraits. The best design for you will depend on your personal style and preferences.
Q10: Where can I find inspiration for my fake tattoo sleeve?
A: You can find inspiration online on sites like Pinterest, Instagram, and tattoo design websites. You can also browse tattoo magazines and visit tattoo studios to see examples of real tattoos.
Conclusion: Express Yourself Fearlessly with Fake Tattoo Sleeves
Creating a fake tattoo sleeve is a fantastic way to express your creativity and experiment with different looks without the commitment of permanent ink. Whether you choose the simplicity of temporary tattoo paper, the artistry of makeup and stencils, or the realism of airbrush tattoos, the possibilities are endless. Remember to prioritize skin safety, choose high-quality materials, and follow proper application and removal procedures. By mastering these techniques, you can confidently sport a stunning fake tattoo sleeve that turns heads and sparks conversations. The world of temporary body art is constantly evolving, with new products and techniques emerging all the time. Embrace the freedom to experiment, express yourself fearlessly, and have fun exploring the transformative power of fake tattoo sleeves. Now that you are equipped with the knowledge, share your experiences with how to make a fake tattoo sleeve in the comments below! We’d love to hear your tips and tricks.

