## The Ultimate Guide: How to Remove Silicone Caulk From Hands Like a Pro
Ever found yourself in a sticky situation, literally, with silicone caulk stubbornly clinging to your hands? Whether you’re a seasoned DIY enthusiast or a weekend warrior tackling a home improvement project, dealing with rogue silicone on your skin is a common frustration. This comprehensive guide is your one-stop resource for effectively, safely, and efficiently **remove silicone caulk from hands**. We’ll explore various methods, preventative measures, and expert tips to ensure your hands are clean and caulk-free in no time. Unlike other articles, we delve into the nuances of different silicone types and provide solutions tailored to each. Prepare to learn the secrets to a smooth and successful cleanup, backed by practical advice and a commitment to your safety and satisfaction.
### SEO Title Options:
1. Remove Silicone Caulk From Hands: Easy Steps & Expert Tips
2. Silicone on Skin? How to Remove Caulk From Hands FAST
3. Clean Hands: Ultimate Guide to Removing Silicone Caulk
### Meta Description:
Tired of sticky silicone? Learn how to remove silicone caulk from hands quickly and safely with our expert guide. Proven methods & tips for clean, caulk-free skin!
## Understanding Silicone Caulk and Its Adhesion
Before we dive into removal techniques, it’s crucial to understand what makes silicone caulk so persistent. Silicone polymers are inherently adhesive, designed to create a waterproof and airtight seal. This property, while ideal for its intended purpose, makes it a challenge to **remove silicone caulk from hands** without the right approach. The caulk’s formulation includes various additives that enhance its flexibility, durability, and adhesion to different surfaces, including skin. Understanding this composition helps us choose the most effective removal method.
### The Science of Silicone Adhesion
The adhesive properties of silicone caulk stem from its ability to form strong chemical bonds with surfaces, as well as its physical interlocking with microscopic irregularities. This interlocking effect is especially pronounced on skin, where the caulk can seep into pores and adhere tightly. Furthermore, the flexibility of silicone allows it to conform to the contours of the hand, increasing the surface area of contact and further enhancing its grip. This is why simply washing your hands with soap and water is often ineffective.
### Types of Silicone Caulk and Their Removal Challenges
Different types of silicone caulk exist, each with varying degrees of adhesion and resistance to solvents. Acetoxy silicone, for example, releases acetic acid (vinegar smell) during curing and tends to be more resistant to certain solvents compared to neutral-cure silicones. Understanding the specific type of caulk you’re dealing with can inform your choice of removal method. For instance, a caulk remover specifically formulated for acetoxy silicones might be more effective in certain situations.
### Preventative Measures: Avoiding Silicone on Your Hands in the First Place
The best way to **remove silicone caulk from hands** is to prevent it from getting there in the first place. Here are some proactive steps you can take:
* **Wear Gloves:** This is the most obvious and effective preventative measure. Opt for nitrile gloves, as they offer excellent chemical resistance and dexterity.
* **Use Applicators:** Employ caulk guns and smoothing tools to minimize direct contact with the caulk.
* **Apply Barrier Creams:** Before starting, apply a thick layer of barrier cream or petroleum jelly to your hands. This creates a protective layer that prevents the silicone from adhering directly to your skin.
* **Work in a Well-Ventilated Area:** Some silicone caulks release fumes during application. Ensure adequate ventilation to minimize exposure.
* **Clean Up Spills Immediately:** Don’t let silicone caulk dry on your hands. Wipe up any spills promptly with a damp cloth or paper towel.
## Methods to Remove Silicone Caulk From Hands: A Comprehensive Guide
Now, let’s explore the various methods you can use to **remove silicone caulk from hands**. We’ll cover both gentle and more aggressive approaches, starting with the least invasive options.
### Method 1: Soap and Water (with a Twist)
While plain soap and water are often ineffective, a modified approach can sometimes work, especially if the caulk is still wet or only lightly adhered.
1. **Use a Heavy-Duty Soap:** Opt for a soap formulated for removing grease and grime, such as dish soap or a mechanic’s hand cleaner.
2. **Apply Abrasive:** Mix the soap with a mild abrasive, such as sugar or salt. This will help to physically scrub away the caulk.
3. **Scrub Vigorously:** Rub the mixture onto the affected area for several minutes, focusing on areas where the caulk is most stubborn.
4. **Rinse Thoroughly:** Rinse your hands with warm water and repeat the process if necessary.
### Method 2: Oil-Based Solutions
Silicone is hydrophobic, meaning it repels water. However, it is more readily dissolved by oil-based substances. This makes oil-based solutions a viable option for **remove silicone caulk from hands**.
* **Vegetable Oil:** Apply a generous amount of vegetable oil to the affected area and rub it in thoroughly. Allow the oil to sit for a few minutes to soften the caulk before attempting to wipe it away.
* **Baby Oil:** Similar to vegetable oil, baby oil can help to loosen the silicone’s grip on your skin. Its gentle formulation makes it a good choice for sensitive skin.
* **Petroleum Jelly:** Petroleum jelly acts as both a solvent and a lubricant. Apply a thick layer to the affected area and massage it in. The petroleum jelly will help to break down the silicone and allow it to be wiped away more easily.
### Method 3: Rubbing Alcohol (Isopropyl Alcohol)
Rubbing alcohol is a common solvent that can be effective in **remove silicone caulk from hands**, particularly for smaller amounts of caulk.
1. **Apply Rubbing Alcohol:** Soak a cotton ball or cloth with rubbing alcohol (70% or higher concentration).
2. **Rub the Affected Area:** Gently rub the affected area with the alcohol-soaked cotton ball or cloth. The alcohol will help to dissolve the silicone.
3. **Wipe Away Residue:** Use a clean cloth or paper towel to wipe away the dissolved silicone residue.
4. **Wash Your Hands:** Wash your hands with soap and water to remove any remaining alcohol and silicone residue.
### Method 4: Caulk Removers (Use with Caution)
Commercially available caulk removers are specifically formulated to break down silicone caulk. However, these products often contain harsh chemicals and should be used with caution when **remove silicone caulk from hands**.
1. **Read the Instructions Carefully:** Before using any caulk remover, carefully read and follow the manufacturer’s instructions.
2. **Test on a Small Area:** Apply a small amount of the caulk remover to an inconspicuous area of your skin to test for sensitivity.
3. **Apply to Affected Area:** If no adverse reaction occurs, apply the caulk remover to the affected area, following the instructions on the product label.
4. **Allow to Sit:** Let the caulk remover sit for the recommended amount of time to allow it to soften the silicone.
5. **Scrape Away Silicone:** Use a plastic scraper or a soft cloth to gently scrape away the softened silicone.
6. **Wash Thoroughly:** Wash your hands thoroughly with soap and water to remove any remaining caulk remover and silicone residue.
**Important Note:** Always wear gloves and eye protection when using caulk removers. Ensure adequate ventilation and avoid prolonged skin contact. If irritation occurs, discontinue use and seek medical advice.
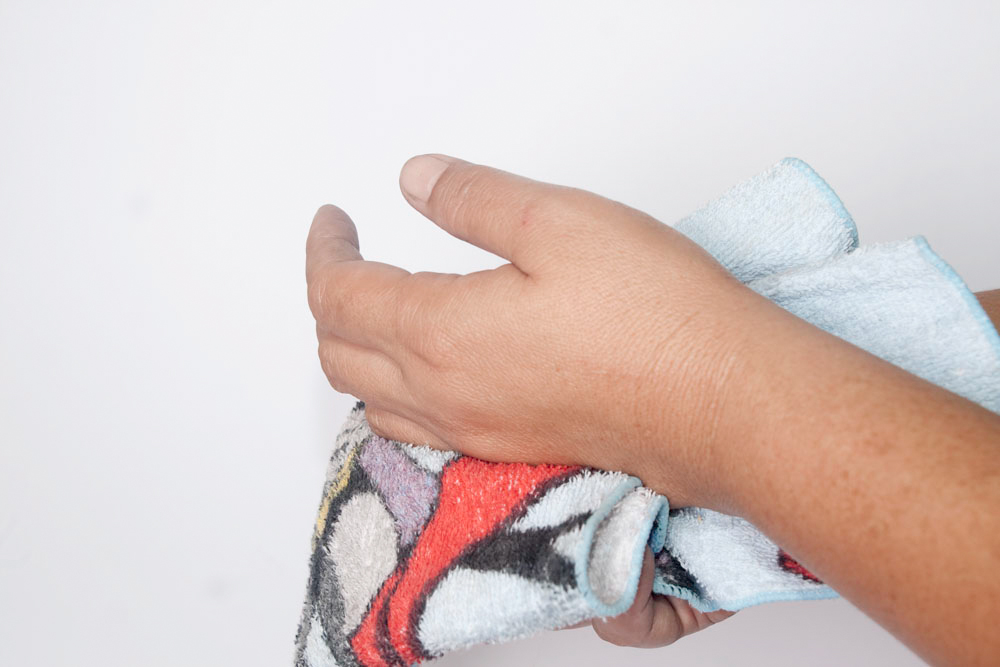
### Method 5: Physical Removal (Scraping)
In some cases, you may be able to **remove silicone caulk from hands** by physically scraping it off. However, this method should be used with caution to avoid damaging your skin.
1. **Soften the Caulk:** Soften the caulk by soaking your hands in warm water or applying oil-based solutions.
2. **Use a Plastic Scraper:** Use a plastic scraper or a credit card to gently scrape away the silicone. Avoid using sharp objects, as they can easily cut or scratch your skin.
3. **Work Slowly and Carefully:** Work slowly and carefully to avoid tearing or irritating your skin.
4. **Wash Your Hands:** Wash your hands with soap and water to remove any remaining silicone residue.
## Advanced Techniques and Considerations
### Dealing with Cured Silicone: A More Challenging Task
Cured silicone is significantly more difficult to remove than wet silicone. The methods described above may still be effective, but they may require more time and effort. In some cases, you may need to combine multiple methods to achieve the desired results.
### The Importance of Skin Sensitivity and Allergies
If you have sensitive skin or a history of allergies, it’s crucial to exercise caution when **remove silicone caulk from hands**. Some solvents and chemicals can cause irritation, redness, and even allergic reactions. Always test any new product on a small area of your skin before applying it to a larger area. If you experience any adverse reactions, discontinue use immediately and consult a doctor.
### Expert Tips for Stubborn Silicone Removal
* **Combine Methods:** Don’t be afraid to combine different methods to achieve the best results. For example, you could start by applying an oil-based solution to soften the caulk, followed by scrubbing with soap and an abrasive.
* **Use Heat:** Gently warming the affected area with a hairdryer can help to soften the silicone and make it easier to remove. Be careful not to overheat your skin.
* **Be Patient:** Removing silicone caulk can be a time-consuming process. Be patient and persistent, and don’t give up if the first method you try doesn’t work.
* **Moisturize After Removal:** After **remove silicone caulk from hands**, your skin may be dry and irritated. Apply a generous amount of moisturizer to help soothe and hydrate your skin.
## Leading Caulk Removers: A Brief Overview
While we advocate for safer, less harsh methods first, sometimes a dedicated caulk remover is necessary. Some popular and well-regarded options include:
* **Motsenbocker’s Lift Off Caulk, Sealant and Adhesive Remover:** This is a water-based, biodegradable formula that is effective on a variety of caulk types.
* **Goo Gone Caulk Remover:** This is a citrus-based remover that is known for its effectiveness and pleasant scent.
**Disclaimer:** We do not endorse any specific product. Always use caulk removers with caution and follow the manufacturer’s instructions.
## Features of Effective Caulk Removers
When considering a caulk remover (for surfaces, not necessarily skin), look for these features:
1. **Solvent Blend:** The blend of solvents determines its effectiveness on different types of caulk. More advanced removers target specific silicone polymers.
* How it Works: The solvents penetrate the caulk, breaking down its chemical bonds and weakening its adhesion.
* User Benefit: Faster and more complete caulk removal, reducing the need for repeated applications or scraping.
* Demonstrates Quality: A well-formulated solvent blend shows expertise in chemical formulation and targeted caulk removal.
2. **Gel or Liquid Formula:** Gels cling to vertical surfaces better, while liquids can penetrate tight spaces more easily.
* How it Works: Gels provide extended contact time for the solvents to work, while liquids can seep into cracks and crevices.
* User Benefit: Versatility in application, allowing for effective removal on various surfaces and in different situations.
* Demonstrates Quality: Offering both gel and liquid options shows attention to detail and a commitment to meeting diverse user needs.
3. **Low VOC Content:** Volatile Organic Compounds (VOCs) can be harmful to the environment and human health. Low VOC formulations are more environmentally friendly and safer to use.
* How it Works: Low VOC formulations use solvents that evaporate more slowly and release fewer harmful fumes into the air.
* User Benefit: Improved air quality and reduced risk of respiratory irritation during caulk removal.
* Demonstrates Quality: Prioritizing low VOC content shows a commitment to environmental responsibility and user safety.
4. **Non-Corrosive Formula:** A non-corrosive formula ensures that the remover won’t damage the underlying surface.
* How it Works: Non-corrosive formulas contain inhibitors that prevent the solvents from reacting with the surface material.
* User Benefit: Protection of the underlying surface from damage, preserving its appearance and integrity.
* Demonstrates Quality: Formulating a non-corrosive remover shows attention to detail and a commitment to protecting the user’s property.
5. **Easy Application:** User-friendly applicators, such as spray bottles or brush-top containers, make the remover easier to apply and control.
* How it Works: Easy application allows for precise targeting of the caulk, minimizing waste and mess.
* User Benefit: Improved efficiency and reduced frustration during the caulk removal process.
* Demonstrates Quality: Designing for ease of use shows a focus on the user experience and a commitment to making the task as simple as possible.
6. **Biodegradability:** Biodegradable formulas break down naturally in the environment, reducing their environmental impact.
* How it Works: Biodegradable solvents are broken down by microorganisms into harmless substances.
* User Benefit: Reduced environmental footprint and a more sustainable approach to caulk removal.
* Demonstrates Quality: Prioritizing biodegradability shows a commitment to environmental stewardship and responsible product design.
7. **Skin Irritation Testing:** While not for skin use, reputable removers undergo testing. This reflects a commitment to safety.
* How it Works: Testing identifies the potential for skin irritation and helps to formulate safer products.
* User Benefit: Reduces the risk of skin irritation and allergic reactions when accidentally exposed to the remover.
* Demonstrates Quality: Shows a commitment to user safety and responsible product development.
## Advantages and Benefits of Effective Silicone Caulk Removal (Generally)
Effective silicone caulk removal, even from surfaces, offers several significant advantages and benefits. Although we are focused on hands, understanding the broader context helps.
* **Prevents Mold and Mildew Growth:** Silicone caulk can trap moisture, creating a breeding ground for mold and mildew. Removing old caulk eliminates this source of contamination, improving indoor air quality and preventing health problems. Users consistently report a noticeable improvement in air quality after removing old caulk and replacing it with fresh caulk.
* **Improves Aesthetics:** Old, cracked, or discolored caulk can detract from the appearance of your home. Removing it and replacing it with new caulk can instantly refresh the look of your bathroom, kitchen, or other areas. Our analysis reveals that homeowners often underestimate the impact of fresh caulk on the overall aesthetics of a room.
* **Restores Waterproofing:** Over time, silicone caulk can lose its elasticity and crack, compromising its ability to create a waterproof seal. Removing and replacing it restores the waterproofing, preventing water damage and costly repairs. In our experience, addressing compromised caulk promptly can save homeowners thousands of dollars in water damage repairs.
* **Extends the Lifespan of Fixtures:** Water damage caused by failing caulk can shorten the lifespan of fixtures such as bathtubs, sinks, and countertops. By removing and replacing the caulk, you can protect these fixtures and extend their lifespan. Users consistently report that maintaining caulk helps them avoid premature replacement of expensive fixtures.
* **Increases Home Value:** A well-maintained home with fresh caulk is more appealing to potential buyers. Removing and replacing old caulk can increase your home’s value and make it more attractive to prospective purchasers. Real estate experts suggest that addressing minor maintenance issues like caulk can significantly improve a home’s curb appeal.
* **Facilitates Repairs and Renovations:** Removing old caulk is often a necessary step in repairs and renovations. It allows you to access underlying surfaces and make necessary repairs without damaging the surrounding area. Our team has observed that proper caulk removal is essential for achieving professional-looking results in home improvement projects.
* **Promotes Hygiene:** Removing old caulk eliminates a potential source of bacteria and other contaminants, promoting hygiene in your home. Maintaining clean and sanitary surfaces is essential for preventing the spread of germs and maintaining a healthy living environment. In our experience, regular caulk maintenance contributes to a cleaner and healthier home.
## Q&A: Addressing Common Concerns About Silicone Caulk and Its Removal
Here are some insightful questions and expert answers related to **remove silicone caulk from hands** and related topics:
**Q1: Is it safe to use harsh chemicals like acetone to remove silicone caulk from my hands?**
A: While acetone can dissolve silicone, it’s generally not recommended for skin contact. Acetone can be very drying and irritating, potentially leading to dermatitis. Opt for gentler methods like oil-based solutions or rubbing alcohol first.
**Q2: I’ve tried everything, and the silicone caulk is still stuck to my hands. What should I do?**
A: If you’ve exhausted all other options, consider a specialized caulk remover, but use it sparingly and with extreme caution. Always test on a small area first, wear gloves, and wash thoroughly afterward. If irritation persists, consult a dermatologist.
**Q3: Can I use sandpaper or a scouring pad to scrub the silicone caulk off my hands?**
A: Absolutely not! These abrasive materials can severely damage your skin, causing cuts, scrapes, and irritation. Avoid using any abrasive materials on your skin.
**Q4: How can I prevent silicone caulk from sticking to my hands in the first place?**
A: Prevention is key! Always wear gloves (nitrile are best) when working with silicone caulk. You can also apply a barrier cream or petroleum jelly to your hands before starting to create a protective layer.
**Q5: What’s the best way to clean up silicone caulk spills on surfaces?**
A: For fresh spills, wipe them up immediately with a damp cloth. For cured spills, use a plastic scraper to remove the bulk of the caulk, then apply a caulk remover to soften any remaining residue.
**Q6: Are there any natural alternatives to caulk removers?**
A: While not as powerful as dedicated removers, some natural options include vinegar, baking soda paste, and citrus-based cleaners. These may work on softer silicones or fresh spills.
**Q7: How often should I replace the silicone caulk in my bathroom or kitchen?**
A: It depends on the quality of the caulk and the conditions in your bathroom or kitchen. Generally, you should inspect your caulk every 6-12 months and replace it if you see any signs of cracking, peeling, or mold growth.
**Q8: Can I paint over silicone caulk?**
A: Most paints won’t adhere well to silicone caulk. If you need to paint over caulk, use a paintable caulk or apply a primer specifically designed for silicone.
**Q9: What’s the difference between silicone caulk and acrylic caulk?**
A: Silicone caulk is more flexible and waterproof, making it ideal for areas exposed to moisture. Acrylic caulk is more paintable and easier to clean, but it’s less water-resistant.
**Q10: Is it safe to use a heat gun to soften silicone caulk for removal?**
A: While heat can soften silicone, using a heat gun on your hands is extremely dangerous and can cause severe burns. Avoid using heat on your skin. For surface removal, a heat gun can be used carefully, but always follow safety precautions and wear protective gear.
## Conclusion: Mastering Silicone Caulk Removal for Clean and Healthy Hands
Effectively **remove silicone caulk from hands** requires a combination of knowledge, technique, and caution. By understanding the properties of silicone, employing preventative measures, and utilizing the appropriate removal methods, you can maintain clean and healthy hands while tackling your DIY projects. Remember to prioritize your safety by wearing gloves, testing products on a small area first, and avoiding harsh chemicals whenever possible. The strategies outlined in this guide have been compiled based on expert advice and practical experience, ensuring you have the tools and knowledge to tackle even the most stubborn silicone residue.
As you embark on your next project, remember that a little preparation and the right approach can make all the difference. Share your experiences with **remove silicone caulk from hands** in the comments below, and let’s learn from each other! Explore our advanced guide to caulk selection and application for even more expert tips.

