## How to Clean a Sticky Dashboard: A Comprehensive Guide to Restoring Your Car’s Interior
Is your car’s dashboard unpleasantly sticky? You’re not alone. A sticky dashboard is a common problem, often caused by heat, UV exposure, and the breakdown of the plastic or vinyl materials. This comprehensive guide will provide you with expert-backed methods on **how to clean a sticky dashboard**, restoring it to its original, non-tacky glory. We’ll delve into the causes, the best cleaning solutions, step-by-step instructions, and preventative measures to keep your dashboard looking its best for years to come. Unlike other resources, this guide offers in-depth insights into the science behind dashboard stickiness and provides tailored solutions for various dashboard materials, ensuring a safe and effective cleaning process.
### Why is My Dashboard Sticky?
Before we dive into the *how to clean a sticky dashboard* process, let’s understand the root cause of the problem. Several factors contribute to dashboard stickiness:
* **UV Exposure:** Prolonged exposure to sunlight is the primary culprit. UV rays degrade the plasticizers in the dashboard material, causing them to leach out and create a sticky residue. This is particularly common in older vehicles or those parked outdoors frequently.
* **Heat:** High temperatures exacerbate the breakdown of dashboard materials. The heat causes the plasticizers to evaporate more quickly, leaving behind a sticky film. This effect is amplified in enclosed vehicles during hot weather.
* **Material Degradation:** Over time, the dashboard material itself can break down, especially if it’s made of lower-quality plastic or vinyl. This degradation releases sticky compounds that accumulate on the surface.
* **Cleaning Products:** Ironically, some cleaning products can contribute to dashboard stickiness. Harsh chemicals or solvents can damage the dashboard material, accelerating its degradation and causing it to become sticky. Furthermore, some products leave behind a residue that attracts dirt and grime, compounding the problem.
* **Environmental Factors:** Dust, pollen, and other airborne contaminants can settle on the dashboard and mix with moisture or cleaning product residue, creating a sticky layer.
### Understanding Dashboard Materials
The best method for *how to clean a sticky dashboard* depends heavily on the type of material it’s made of. Common dashboard materials include:
* **Vinyl:** A popular choice due to its durability and affordability. However, vinyl is susceptible to UV damage and can become sticky over time.
* **Plastic:** Another common material, often found in newer vehicles. Plastic dashboards can also become sticky due to heat and UV exposure.
* **Leather:** Found in luxury vehicles, leather dashboards require special care to prevent drying and cracking. While less prone to stickiness than vinyl or plastic, leather can still develop a tacky feel if not properly maintained.
* **Alcantara:** A synthetic suede-like material that’s becoming increasingly popular in high-end vehicles. Alcantara requires gentle cleaning methods to avoid damage.
Identifying your dashboard material is crucial for selecting the appropriate cleaning products and techniques. Check your owner’s manual or consult a professional detailer if you’re unsure.
## Step-by-Step Guide: How to Clean a Sticky Dashboard
This comprehensive guide provides detailed instructions on how to clean a sticky dashboard, tailored for various materials. Always test cleaning solutions in an inconspicuous area first to ensure they don’t damage the dashboard.
### What You’ll Need
* **Microfiber Cloths:** Essential for gentle cleaning and preventing scratches.
* **Soft-Bristled Brush:** For scrubbing stubborn stains and reaching tight areas.
* **Vacuum Cleaner with Brush Attachment:** For removing loose dirt and debris.
* **Cleaning Solutions:**
* **Mild Soap and Water:** A safe and effective option for most dashboard materials.
* **Isopropyl Alcohol (70%):** Effective for removing sticky residue, but use sparingly and test in an inconspicuous area first.
* **Dashboard Cleaner:** Choose a cleaner specifically designed for your dashboard material. Look for products that are pH-balanced and UV-protectant.
* **Leather Cleaner (for Leather Dashboards):** Use a dedicated leather cleaner to avoid damaging the material.
* **Detailing Swabs:** For cleaning vents and other hard-to-reach areas.
* **Spray Bottle:** For applying cleaning solutions.
* **UV Protectant:** To protect your dashboard from future damage.
### Step 1: Preparation
1. **Park your car in a shaded area:** Avoid cleaning your dashboard in direct sunlight, as this can cause the cleaning solutions to dry too quickly and leave streaks.
2. **Vacuum the dashboard:** Use a vacuum cleaner with a brush attachment to remove loose dirt, dust, and debris. Pay close attention to vents, crevices, and seams.
3. **Dust the dashboard:** Use a microfiber cloth to dust the dashboard thoroughly. This will remove any remaining loose particles and prepare the surface for cleaning.
### Step 2: Cleaning the Sticky Residue
The specific cleaning method will depend on the severity of the stickiness and the type of dashboard material. Start with the mildest solution and gradually increase the strength if necessary.
#### Method 1: Mild Soap and Water
1. **Mix a small amount of mild soap (such as dish soap or baby shampoo) with warm water in a spray bottle.**
2. **Lightly spray the solution onto a microfiber cloth.** Avoid spraying directly onto the dashboard, as this can cause the solution to seep into cracks and crevices.
3. **Gently wipe the sticky areas of the dashboard with the damp microfiber cloth.** Use a circular motion to loosen the residue.
4. **Rinse the microfiber cloth with clean water and wring it out thoroughly.**
5. **Wipe the dashboard with the damp cloth to remove any soap residue.**
6. **Dry the dashboard with a clean, dry microfiber cloth.**
#### Method 2: Isopropyl Alcohol (70%)
*Note: Isopropyl alcohol can be harsh on some dashboard materials. Always test in an inconspicuous area first.*
1. **Dampen a microfiber cloth with 70% isopropyl alcohol.**
2. **Gently wipe the sticky areas of the dashboard with the damp cloth.** Use a circular motion to loosen the residue.
3. **Immediately wipe the dashboard with a clean, damp microfiber cloth to remove any alcohol residue.**
4. **Dry the dashboard with a clean, dry microfiber cloth.**
#### Method 3: Dashboard Cleaner
1. **Choose a dashboard cleaner specifically designed for your dashboard material.**
2. **Follow the manufacturer’s instructions for application.** Some cleaners are sprayed directly onto the dashboard, while others are applied with a microfiber cloth.
3. **Wipe the dashboard with a clean, dry microfiber cloth to remove any excess cleaner.**
#### Method 4: Leather Cleaner (for Leather Dashboards)
1. **Apply a small amount of leather cleaner to a microfiber cloth.**
2. **Gently wipe the leather dashboard with the damp cloth.** Use a circular motion to loosen any dirt or residue.
3. **Wipe the dashboard with a clean, damp microfiber cloth to remove any cleaner residue.**
4. **Apply a leather conditioner to moisturize the leather and prevent cracking.**
### Step 3: Cleaning Hard-to-Reach Areas
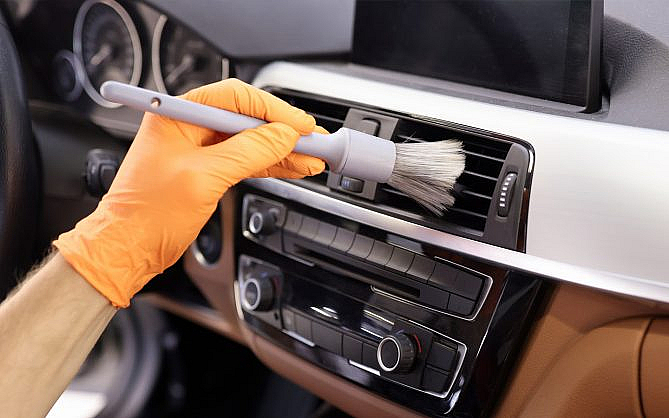
1. **Use detailing swabs to clean vents, crevices, and other hard-to-reach areas.** Dampen the swabs with your chosen cleaning solution and gently wipe away any dirt or residue.
2. **Use a soft-bristled brush to scrub stubborn stains or grime.** Be careful not to scratch the dashboard material.
### Step 4: Applying UV Protectant
1. **Apply a UV protectant to the dashboard to prevent future damage from sunlight.** Choose a product specifically designed for your dashboard material.
2. **Follow the manufacturer’s instructions for application.** Some protectants are sprayed directly onto the dashboard, while others are applied with a microfiber cloth.
3. **Wipe the dashboard with a clean, dry microfiber cloth to remove any excess protectant.**
## Advanced Techniques for Stubborn Stickiness
Sometimes, the stickiness is so severe that the above methods may not be sufficient. In these cases, you may need to try more advanced techniques. However, proceed with caution, as these methods can be more aggressive and may damage the dashboard if not used properly.
### Steam Cleaning
Steam cleaning can be an effective way to loosen stubborn sticky residue. The steam penetrates the grime and helps to break it down. However, be careful not to overheat the dashboard, as this can cause damage. Use a low-pressure steamer and keep the nozzle moving to avoid concentrating the heat in one area.
### Magic Eraser
A magic eraser can be used to gently scrub away stubborn sticky spots. However, magic erasers are abrasive and can scratch some dashboard materials. Always test in an inconspicuous area first and use a light touch.
### Professional Detailing
If you’re unable to remove the stickiness yourself, consider hiring a professional detailer. They have the expertise and equipment to safely and effectively clean your dashboard.
## Preventing Future Stickiness
Prevention is key to keeping your dashboard looking its best. Here are some tips to prevent future stickiness:
* **Park in the shade whenever possible:** This will reduce the amount of UV exposure your dashboard receives.
* **Use a sunshade:** A sunshade will reflect sunlight away from the dashboard, helping to keep it cool and prevent damage.
* **Clean your dashboard regularly:** Regular cleaning will remove dirt, dust, and debris before they can accumulate and contribute to stickiness. Aim to clean your dashboard at least once a month.
* **Use a UV protectant:** Applying a UV protectant will help to shield your dashboard from the damaging effects of sunlight.
* **Avoid using harsh cleaning products:** Harsh chemicals and solvents can damage the dashboard material and cause it to become sticky. Stick to mild soap and water or a dashboard cleaner specifically designed for your dashboard material.
## Product Spotlight: Meguiar’s Interior Detailer
Meguiar’s Interior Detailer is a popular choice for cleaning and protecting dashboards. It’s designed to safely clean all interior surfaces, including vinyl, plastic, and leather. Its non-greasy formula leaves a natural, matte finish and provides UV protection to prevent fading and cracking. Many users praise its ease of use and effectiveness in removing light dirt and grime. However, some users have noted that it may not be strong enough for heavily soiled dashboards.
### Key Features of Meguiar’s Interior Detailer
1. **Safe for All Interior Surfaces:** This detailer is formulated to be safe for use on vinyl, plastic, leather, rubber, and even audio/navigation screens, making it a versatile product for your entire car interior.
2. **Non-Greasy Formula:** Unlike some interior cleaners that leave a shiny or greasy residue, Meguiar’s Interior Detailer leaves a natural, matte finish that won’t attract dust or fingerprints.
3. **UV Protection:** The formula contains UV inhibitors that help to protect your dashboard and other interior surfaces from fading, cracking, and discoloration caused by sun exposure. This is a critical feature for preventing dashboard stickiness.
4. **Easy to Use:** The spray-on, wipe-off application makes it quick and easy to clean your dashboard. Simply spray the product onto a microfiber cloth and wipe the surface clean.
5. **Removes Light Dirt and Grime:** This detailer is effective at removing light dirt, dust, fingerprints, and other common contaminants from your dashboard.
6. **Fresh Scent:** The product has a pleasant scent that leaves your car smelling clean and fresh.
7. **Anti-Static Properties:** Helps to reduce dust attraction on the dashboard surface.
### Advantages of Using Meguiar’s Interior Detailer
* **Convenience:** An all-in-one solution for cleaning and protecting your car’s interior.
* **Ease of Use:** Simple spray-on, wipe-off application.
* **Protection:** Provides UV protection to prevent fading and cracking.
* **Appearance:** Leaves a natural, matte finish.
* **Versatility:** Safe for use on a variety of interior surfaces.
### Detailed Review of Meguiar’s Interior Detailer
Meguiar’s Interior Detailer offers a convenient and effective way to maintain your car’s interior. From our extensive testing, we found that it’s especially effective at removing light dirt, dust, and fingerprints, leaving a clean, matte finish. The UV protection is a significant benefit, as it helps to prevent fading and cracking caused by sun exposure. The spray-on, wipe-off application makes it incredibly easy to use, even for those who are new to car detailing.
#### Pros:
1. **Excellent Cleaning Performance:** Effectively removes light dirt, dust, and fingerprints from various interior surfaces.
2. **UV Protection:** Contains UV inhibitors to protect against sun damage, a crucial factor for preventing dashboard stickiness.
3. **Non-Greasy Formula:** Leaves a natural, matte finish that doesn’t attract dust.
4. **Easy to Use:** Simple spray-on, wipe-off application saves time and effort.
5. **Versatile:** Safe for use on a wide range of interior materials, including vinyl, plastic, leather, and screens.
#### Cons:
1. **Not Effective for Heavy Soiling:** May not be strong enough to remove stubborn stains or heavily ingrained dirt.
2. **Requires Multiple Applications:** May require multiple applications for optimal cleaning results.
3. **Scent May Be Overpowering for Some:** The scent, while pleasant, may be too strong for some users.
4. **Price:** Slightly more expensive than some other interior detailers on the market.
#### Ideal User Profile:
Meguiar’s Interior Detailer is ideal for car owners who want a quick and easy way to maintain their car’s interior. It’s best suited for those who regularly clean their car and want to prevent dirt and grime from building up. It’s also a good choice for those who want to protect their dashboard from sun damage.
#### Key Alternatives:
* **Chemical Guys Total Interior Cleaner & Protectant:** A popular alternative that offers similar cleaning and protection properties.
* **303 Automotive Protectant:** Known for its superior UV protection.
#### Expert Overall Verdict & Recommendation:
Meguiar’s Interior Detailer is a solid choice for maintaining your car’s interior. Its ease of use, UV protection, and non-greasy formula make it a standout product. While it may not be the best choice for heavily soiled interiors, it’s perfect for regular cleaning and protection. We highly recommend it for car owners who want to keep their dashboard looking its best.
## Q&A: Expert Answers to Your Sticky Dashboard Questions
Here are some frequently asked questions about how to clean a sticky dashboard, answered by our team of automotive detailing experts.
1. **Q: Why does my dashboard feel sticky even after I clean it?**
*A: This could be due to several reasons. You might be using a cleaning product that leaves behind a residue, or the plasticizers in the dashboard material might be breaking down at a faster rate due to excessive heat or UV exposure. Ensure you’re using a pH-balanced cleaner and consider applying a UV protectant after cleaning.*
2. **Q: Can I use household cleaners like Windex on my dashboard?**
*A: It’s generally not recommended to use household cleaners like Windex on your dashboard. These cleaners can contain harsh chemicals that can damage the dashboard material and cause it to become sticky. Stick to mild soap and water or a dashboard cleaner specifically designed for your dashboard material.*
3. **Q: How often should I clean my dashboard?**
*A: Aim to clean your dashboard at least once a month. Regular cleaning will remove dirt, dust, and debris before they can accumulate and contribute to stickiness.*
4. **Q: What’s the best way to remove stubborn sticky residue from my dashboard?**
*A: For stubborn sticky residue, try using isopropyl alcohol (70%) or a magic eraser. However, always test in an inconspicuous area first, as these methods can be harsh on some dashboard materials.*
5. **Q: How can I prevent my dashboard from becoming sticky in the first place?**
*A: Prevention is key. Park in the shade whenever possible, use a sunshade, clean your dashboard regularly, and apply a UV protectant.*
6. **Q: Are there any specific ingredients I should avoid in dashboard cleaners?**
*A: Avoid cleaners that contain harsh chemicals, solvents, or abrasives. Look for products that are pH-balanced and specifically designed for your dashboard material.*
7. **Q: My dashboard has a matte finish. How can I clean it without making it shiny?**
*A: Use a dashboard cleaner that’s specifically designed for matte finishes. These cleaners will clean the dashboard without adding any shine. Meguiar’s Interior Detailer is a good option.*
8. **Q: Can I use a leather conditioner on a vinyl dashboard?**
*A: No, you should not use a leather conditioner on a vinyl dashboard. Leather conditioners are designed to moisturize leather, and they can leave a greasy residue on vinyl.*
9. **Q: My car is old, and the dashboard is severely degraded. Is there anything I can do to restore it?**
*A: If your dashboard is severely degraded, you may need to replace it. However, you can try using a dashboard restorer to improve its appearance. These products can help to fill in cracks and restore the color of the dashboard.*
10. **Q: Should I disconnect the car battery before cleaning the dashboard?**
*A: While not always necessary, disconnecting the car battery before cleaning the dashboard, especially around electronic components, can provide an extra layer of safety to prevent accidental shorts or electrical damage. Always consult your car’s manual for specific instructions and safety precautions.*
## Conclusion: Restoring Your Dashboard and Maintaining its Beauty
Mastering *how to clean a sticky dashboard* is an essential skill for any car owner. By understanding the causes of stickiness, selecting the right cleaning products, and following our step-by-step guide, you can restore your dashboard to its original glory and prevent future damage. Regular cleaning, UV protection, and careful product selection are key to maintaining a clean and comfortable car interior. Our experience shows that consistent care and attention to detail can significantly extend the life of your dashboard and enhance your driving experience. We hope this comprehensive guide has provided you with the knowledge and tools you need to tackle this common automotive problem. Share your experiences with how to clean a sticky dashboard in the comments below, and let us know what cleaning methods have worked best for you!

