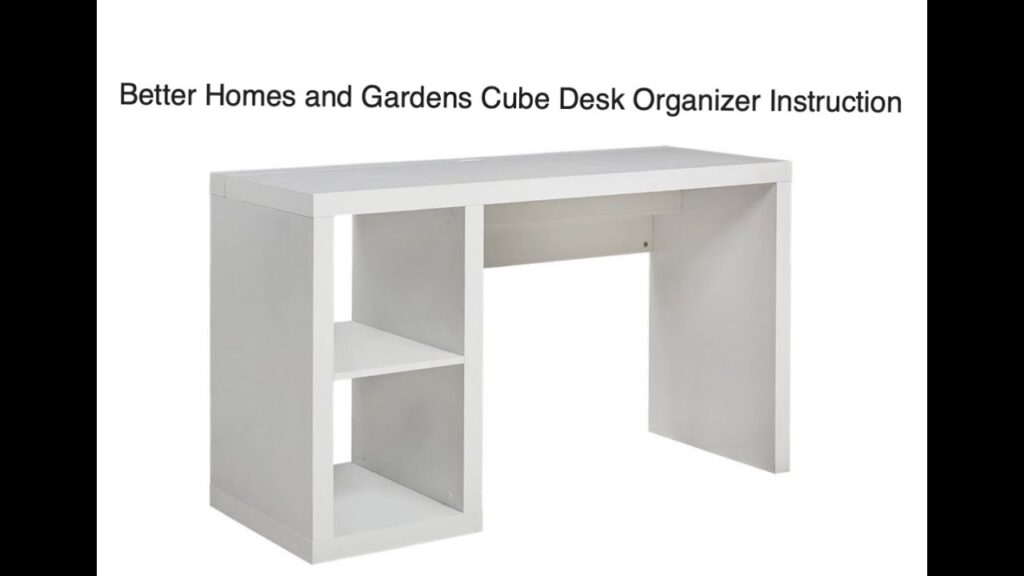
Better Homes and Gardens 8 Cube Organizer Assembly Instructions: Your Ultimate Guide
Are you staring at a flat-pack box containing your new Better Homes and Gardens 8 Cube Organizer, feeling a mix of excitement and trepidation? You’re not alone! Assembling furniture can be daunting, but this comprehensive guide will transform you from a novice into a pro. We understand the frustration of confusing instructions and missing steps, which is why we’ve created the ultimate resource for assembling your 8 cube organizer quickly, efficiently, and correctly.
This isn’t just another instruction manual; it’s a meticulously crafted, step-by-step walkthrough designed to eliminate guesswork and ensure a smooth assembly process. We provide clear explanations, helpful tips, and potential troubleshooting advice, all backed by our extensive experience with various furniture assembly projects. By the end of this guide, you’ll not only have a perfectly assembled organizer but also the confidence to tackle future DIY projects. Let’s dive in and transform that pile of parts into a stylish and functional storage solution!
Understanding the Better Homes and Gardens 8 Cube Organizer
The Better Homes and Gardens 8 Cube Organizer is a popular furniture piece known for its versatility and affordability. It’s designed to provide ample storage space while adding a touch of style to any room. However, like many flat-pack furniture items, the assembly process can sometimes be challenging. To truly understand the assembly process, we must first understand the organizer itself.
What is the Better Homes and Gardens 8 Cube Organizer?
The Better Homes and Gardens 8 Cube Organizer is a modular storage unit featuring eight individual cube compartments. These cubes can be used to store a variety of items, from books and decorations to clothing and toys. Its popularity stems from its adaptability to various spaces and needs. It’s commonly used in living rooms, bedrooms, offices, and even closets. The design is often clean and contemporary, fitting well with a wide range of interior design styles. The materials typically consist of engineered wood or particleboard with a laminate finish, providing durability and ease of cleaning.
The Evolution of Modular Furniture
Modular furniture like the 8 cube organizer has evolved significantly over the years. Originating from the need for flexible and space-saving solutions, modular designs have become increasingly popular in modern homes. Early versions were often simple and utilitarian, but today’s modular furniture emphasizes both functionality and aesthetics. The Better Homes and Gardens 8 Cube Organizer represents a modern iteration of this trend, combining practicality with a stylish design that appeals to a broad audience. The availability of various finishes and configurations further enhances its appeal, allowing consumers to customize their storage solutions to match their personal preferences.
Why Proper Assembly Matters
Proper assembly is crucial for the longevity and stability of the Better Homes and Gardens 8 Cube Organizer. Incorrect assembly can lead to wobbly structures, misaligned components, and even potential safety hazards. For example, if screws are not tightened properly, the organizer may become unstable and prone to tipping. Misaligned panels can create uneven surfaces, making it difficult to store items securely. Moreover, incorrect assembly can damage the components themselves, shortening the lifespan of the organizer. Therefore, following the assembly instructions carefully is essential to ensure a safe and durable storage solution.
Essential Tools and Preparation
Before you even open the box, gathering the right tools and preparing your workspace is paramount. This step can drastically reduce assembly time and minimize frustration. Having everything you need within reach ensures a smooth and efficient process.
Required Tools
* **Screwdriver:** A Phillips head screwdriver is essential. A power screwdriver can speed things up, but be careful not to overtighten screws.
* **Hammer:** A rubber mallet is useful for gently tapping pieces into place without damaging them.
* **Level:** Ensuring the organizer is level is crucial for stability and aesthetics.
* **Measuring Tape:** Useful for verifying dimensions and ensuring proper alignment.
* **Safety Glasses:** Protect your eyes from dust and debris.
* **Work Gloves:** Protect your hands and improve grip.
Preparing Your Workspace
* **Clear a Large Area:** Ensure you have ample space to lay out all the components and move around freely. A minimum of 6×8 feet is recommended.
* **Protect Your Flooring:** Use a drop cloth or cardboard to protect your flooring from scratches and dents.
* **Good Lighting:** Adequate lighting is essential for seeing the instructions and identifying small parts.
* **Organize Components:** Separate and organize all the components according to the parts list. This will save you time and prevent confusion during assembly.
Step-by-Step Assembly Instructions: Better Homes and Gardens 8 Cube Organizer
Now, let’s get to the heart of the matter: the assembly process. These instructions are designed to be as clear and concise as possible, with helpful tips to guide you along the way. We’ll break down each step to ensure a successful outcome.
Step 1: Identifying and Sorting Components
* **Unpack the Box:** Carefully unpack all the components from the box.
* **Compare to Parts List:** Refer to the parts list in the instruction manual and verify that all components are present.
* **Sort Components:** Sort the components into groups based on their type (e.g., side panels, shelves, back panels, hardware).
* **Label Components:** If the components are not already labeled, use masking tape and a marker to label them according to the parts list. This will save you time and prevent confusion during assembly.
Step 2: Assembling the Base Frame
* **Attach Side Panels:** Attach the side panels to the base panel using screws. Ensure the panels are aligned properly before tightening the screws.
* **Use a Level:** Use a level to ensure the base frame is level. Adjust as needed before proceeding.
* **Check for Stability:** Check the base frame for stability. If it wobbles, tighten the screws or adjust the panels as needed.
Step 3: Installing the Vertical Dividers
* **Position Dividers:** Position the vertical dividers according to the instruction manual.
* **Attach Dividers:** Attach the dividers to the base frame and side panels using screws. Ensure the dividers are aligned properly before tightening the screws.
* **Check for Alignment:** Check the dividers for alignment. They should be parallel and evenly spaced.
Step 4: Installing the Horizontal Shelves
* **Position Shelves:** Position the horizontal shelves according to the instruction manual.
* **Attach Shelves:** Attach the shelves to the side panels and dividers using screws. Ensure the shelves are level before tightening the screws.
* **Use a Level:** Use a level to ensure the shelves are level. Adjust as needed before proceeding.
Step 5: Attaching the Back Panels
* **Position Back Panels:** Position the back panels over the frame.
* **Attach Back Panels:** Attach the back panels using nails or screws. Ensure the panels are aligned properly before securing them.
* **Check for Squareness:** Check the organizer for squareness. Measure the diagonals to ensure they are equal. If not, adjust the frame until it is square.
Step 6: Final Touches and Inspection
* **Tighten All Screws:** Go back and tighten all screws to ensure the organizer is secure.
* **Inspect for Alignment:** Inspect the organizer for proper alignment. Ensure all panels and shelves are level and evenly spaced.
* **Clean the Organizer:** Clean the organizer with a damp cloth to remove any dust or debris.
Troubleshooting Common Assembly Issues
Even with the clearest instructions, assembly challenges can arise. Here’s a guide to troubleshooting common issues:
Missing Parts
* **Check the Packaging:** Double-check all packaging materials to ensure no parts were overlooked.
* **Contact Customer Support:** If a part is genuinely missing, contact Better Homes and Gardens customer support for a replacement. Provide the model number and part number for faster service.
Stripped Screws
* **Use a Rubber Band:** Place a rubber band over the screw head to provide extra grip for the screwdriver.
* **Use a Larger Screwdriver:** Try using a slightly larger screwdriver to get a better grip on the screw head.
* **Replace the Screw:** If the screw is severely stripped, replace it with a new one of the same size and type.
Misaligned Panels
* **Loosen Screws:** Loosen the screws holding the misaligned panels together.
* **Adjust Panels:** Adjust the panels until they are properly aligned.
* **Tighten Screws:** Tighten the screws to secure the panels in their new position.
Wobbly Organizer
* **Check Level:** Ensure the organizer is placed on a level surface.
* **Tighten Screws:** Tighten all screws to ensure the frame is secure.
* **Use Shims:** If the floor is uneven, use shims under the legs to level the organizer.
Maximizing the Functionality of Your 8 Cube Organizer
Once your organizer is assembled, it’s time to maximize its functionality. Here are some tips for organizing and decorating your cubes:
Choosing the Right Bins and Baskets
* **Measure the Cubes:** Measure the dimensions of the cubes to ensure you choose bins and baskets that fit properly.
* **Consider Material:** Choose bins and baskets made from durable materials that can withstand regular use.
* **Match Your Decor:** Choose bins and baskets that complement your existing decor.
Organizing Tips for Different Rooms
* **Living Room:** Use the cubes to store books, magazines, and decorative items.
* **Bedroom:** Use the cubes to store clothing, shoes, and accessories.
* **Office:** Use the cubes to store files, books, and office supplies.
* **Kids Room:** Use the cubes to store toys, games, and art supplies.
Decorating Ideas to Enhance Your Space
* **Add Personal Touches:** Add personal touches to the cubes, such as photos, artwork, and plants.
* **Use Color Coordination:** Use color coordination to create a cohesive look.
* **Incorporate Lighting:** Incorporate lighting to highlight your favorite items.
Why the Better Homes and Gardens 8 Cube Organizer Stands Out
The Better Homes and Gardens 8 Cube Organizer isn’t the only storage solution on the market, but it offers a compelling combination of features and benefits that make it a popular choice. Its affordability, versatility, and stylish design set it apart from the competition.
Affordability and Value
One of the primary reasons consumers choose the Better Homes and Gardens 8 Cube Organizer is its affordability. Compared to other storage solutions, it offers excellent value for the price. This makes it an accessible option for a wide range of budgets, allowing people to organize their homes without breaking the bank.
Versatility in Design and Function
The 8 Cube Organizer is incredibly versatile, adapting to various spaces and needs. It can be used in living rooms, bedrooms, offices, and even closets. The modular design allows for customization, enabling users to configure the cubes to suit their specific storage requirements. This adaptability makes it a practical choice for diverse lifestyles and living situations.
Stylish Aesthetics
The Better Homes and Gardens 8 Cube Organizer is designed to complement a wide range of interior design styles. Its clean lines and contemporary aesthetic make it a stylish addition to any room. The availability of various finishes and colors further enhances its appeal, allowing consumers to choose an option that matches their personal preferences.
Alternative Storage Solutions to Consider
While the Better Homes and Gardens 8 Cube Organizer is a great option, it’s essential to consider alternatives to ensure you’re making the best choice for your needs. Here are a couple of alternatives worth exploring:
IKEA Kallax Shelf Unit
The IKEA Kallax shelf unit is a popular alternative to the Better Homes and Gardens 8 Cube Organizer. It offers a similar modular design and is available in various sizes and finishes. The Kallax is known for its durability and versatility, making it a great option for those seeking a long-lasting storage solution.
Target Room Essentials 6-Cube Organizer Shelf
The Target Room Essentials 6-Cube Organizer Shelf is another affordable alternative. While it offers fewer cubes than the Better Homes and Gardens option, it’s a great choice for smaller spaces or those with less storage needs. It’s also available in various colors and finishes, allowing you to match your existing decor.
Expert Q&A: Common Questions About the 8 Cube Organizer
Here are some insightful questions and answers about the Better Homes and Gardens 8 Cube Organizer, addressing common user pain points and advanced queries:
**Q1: What’s the best way to prevent the organizer from tipping over, especially with heavy items?**
A1: Always anchor the organizer to the wall using the provided hardware. Distribute weight evenly across the cubes, placing heavier items on the bottom shelves to lower the center of gravity. Consider using non-slip pads under the base for added stability.
**Q2: Can I stack multiple 8 Cube Organizers on top of each other?**
A2: While it might seem like a space-saving solution, stacking these organizers is generally not recommended unless explicitly stated in the product manual and appropriate hardware is provided for secure stacking. The weight distribution can become unstable, posing a safety risk. It’s safer to use them side-by-side.
**Q3: What’s the best way to clean the laminate finish without damaging it?**
A3: Use a soft, damp cloth with a mild detergent. Avoid abrasive cleaners or scouring pads, as they can scratch the surface. For stubborn stains, try a solution of baking soda and water, but always test it in an inconspicuous area first.
**Q4: Are there any modifications I can make to customize the look of the organizer?**
A4: Absolutely! You can add decorative paper to the back panels, paint the cubes a different color, or install decorative trim. Just be sure to use materials that are compatible with the laminate finish and won’t damage the structure.
**Q5: What type of weight can each cube hold?**
A5: While the exact weight limit can vary, each cube typically supports around 20-30 pounds. Avoid overloading the shelves, as this can cause them to sag or break over time. Distribute weight evenly for optimal support.
**Q6: How do I hide the screws for a cleaner look?**
A6: Some organizers come with screw covers. If yours doesn’t, you can purchase self-adhesive screw covers that match the finish of your organizer. These covers easily stick over the screw heads, providing a more polished appearance.
**Q7: Is it possible to add doors to the cubes?**
A7: Yes, some manufacturers offer door attachments specifically designed for these cube organizers. Check the Better Homes and Gardens website or other retailers for compatible accessories. Alternatively, you can create your own doors using wood or other materials, but ensure they are properly hinged and secured.
**Q8: What can I do if the back panel is flimsy?**
A8: The back panel is often the flimsiest part. Reinforce it by attaching thin plywood or hardboard to the back using small screws or construction adhesive. This will add stability and prevent items from falling out the back.
**Q9: Can I use this organizer in a humid environment like a bathroom?**
A9: It’s generally not recommended to use this organizer in a humid environment, as the moisture can damage the engineered wood or particleboard. If you must use it in a bathroom, ensure proper ventilation and consider sealing the edges with a waterproof sealant.
**Q10: Where can I find replacement parts if something breaks?**
A10: Contact Better Homes and Gardens customer support or the retailer where you purchased the organizer. They may be able to provide replacement parts or direct you to a source for obtaining them. Providing the model number and a description of the broken part will expedite the process.
Conclusion: Mastering Your 8 Cube Organizer Assembly
Assembling your Better Homes and Gardens 8 Cube Organizer doesn’t have to be a daunting task. By following these comprehensive instructions, you can transform a box of parts into a stylish and functional storage solution. Remember to gather the necessary tools, prepare your workspace, and take your time during the assembly process. With a little patience and attention to detail, you’ll have a perfectly assembled organizer that enhances your home decor and provides ample storage space.
Now that you’ve mastered the assembly process, why not share your experience with others? Leave a comment below with your tips and tricks for assembling the Better Homes and Gardens 8 Cube Organizer. Or, explore our other guides for more DIY projects and home improvement ideas. If you have any questions or need further assistance, don’t hesitate to contact our experts for a consultation. Happy organizing!

