How to Repair Rubber: The Ultimate Guide to Fixing and Restoring Rubber Materials
Rubber, a versatile material used in countless applications, from tires to seals, is susceptible to damage. Knowing how to repair rubber is a valuable skill, saving you money and extending the life of your rubber products. This comprehensive guide provides expert insights, practical techniques, and essential tips for effectively repairing various types of rubber damage. Whether you’re dealing with a small tear, a puncture, or general wear and tear, this article will equip you with the knowledge and skills to restore your rubber items to their former glory. We will cover a range of repair methods, from simple adhesives to more advanced patching techniques, ensuring you have the right solution for your specific situation. Based on our extensive experience in material restoration, we’ll provide insights into selecting the best materials and tools for each repair, ensuring long-lasting and reliable results.
Understanding Rubber Types and Damage
Not all rubber is created equal. Different types of rubber, such as natural rubber, synthetic rubber (like neoprene, EPDM, and silicone), and vulcanized rubber, possess varying properties and react differently to repair methods. Understanding the specific type of rubber you’re working with is crucial for selecting the appropriate repair technique and materials. For instance, a repair suitable for natural rubber might not work effectively on silicone rubber.
Common types of rubber damage include:
- Tears: Often caused by stress, stretching, or sharp objects.
- Punctures: Resulting from impacts or penetration by sharp objects.
- Abrasion: Surface wear caused by friction or rubbing.
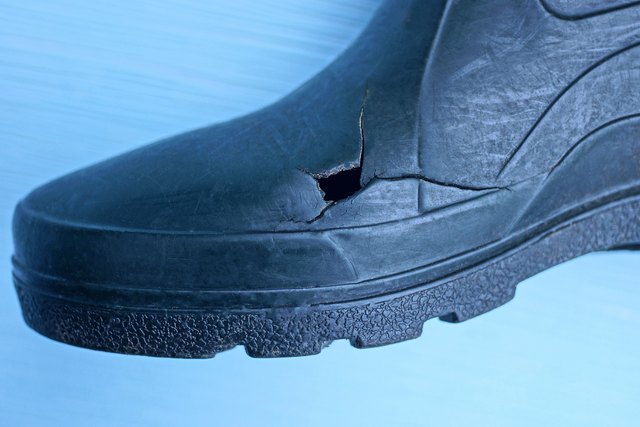
- Cracking: Often due to exposure to UV light, ozone, or chemicals.
- Degradation: Chemical breakdown of the rubber material over time.
Accurately assessing the type and extent of damage is the first step in determining the best repair strategy. Minor tears and punctures can often be repaired with adhesives, while more extensive damage may require patching or replacement.
Essential Tools and Materials for Rubber Repair
Having the right tools and materials is essential for successful rubber repair. Here’s a list of commonly used items:
- Rubber adhesives: Specialized adhesives designed to bond rubber materials. Cyanoacrylate (super glue) works for some repairs, but dedicated rubber cement or flexible adhesives are often better.
- Rubber patches: Pre-cut or custom-cut patches made from compatible rubber material.
- Cleaning agents: Isopropyl alcohol or specialized rubber cleaners to remove dirt, grease, and contaminants.
- Sandpaper or abrasive pads: For preparing the surface for adhesion.
- Scissors or utility knife: For cutting patches and trimming excess material.
- Clamps or weights: To hold the repaired area together while the adhesive cures.
- Heat gun or hair dryer (optional): To accelerate the curing process of some adhesives.
- Protective gloves and eyewear: To protect yourself from chemicals and debris.
Selecting high-quality materials is crucial for ensuring a durable and long-lasting repair. Always check the manufacturer’s instructions and compatibility with the specific type of rubber you’re working with.
Step-by-Step Guide: How to Repair a Tear in Rubber
Repairing a tear in rubber requires careful preparation and precise application. Here’s a step-by-step guide:
- Clean the area: Thoroughly clean the area around the tear with isopropyl alcohol or a rubber cleaner. Remove any dirt, grease, or loose debris.
- Prepare the surface: Lightly sand or abrade the edges of the tear to create a slightly roughened surface for better adhesion.
- Apply adhesive: Apply a thin, even layer of rubber adhesive to both sides of the tear.
- Join the edges: Carefully align the edges of the tear and press them together firmly.
- Clamp or weigh down: Use clamps or weights to hold the repaired area together while the adhesive cures. Follow the manufacturer’s instructions for curing time.
- Trim excess adhesive: Once the adhesive is fully cured, trim any excess adhesive with a sharp utility knife or scissors.
- Inspect the repair: Carefully inspect the repair to ensure a strong and seamless bond.
For larger tears, consider using a rubber patch to reinforce the repair. Cut a patch slightly larger than the tear and apply it over the repaired area using the same adhesive technique.
Repairing Punctures in Rubber: A Practical Approach
Punctures, often smaller and more localized than tears, require a slightly different approach. Here’s how to repair a puncture in rubber:
- Clean and prepare: As with tears, thoroughly clean around the puncture with isopropyl alcohol. Roughen the surface slightly with fine-grit sandpaper.
- Apply adhesive: Apply a small amount of rubber adhesive directly into the puncture.
- Insert a plug (optional): For larger punctures, consider using a small rubber plug or filler to fill the void.
- Apply a patch: Cut a small rubber patch and apply it over the puncture, ensuring it covers the entire damaged area.
- Cure and trim: Clamp or weigh down the patch and allow the adhesive to cure completely. Trim any excess material after curing.
For tire punctures, specialized tire repair kits are available. These kits typically include plugs and tools designed for safe and effective tire repair.
Advanced Rubber Repair Techniques: Patching and Vulcanization
For more extensive damage or repairs requiring greater strength and durability, patching and vulcanization techniques may be necessary.
Patching
Patching involves applying a larger piece of rubber material over the damaged area to provide reinforcement. This technique is suitable for larger tears, punctures, or areas with significant wear and tear.
- Prepare the surface: Thoroughly clean and roughen the surface around the damaged area.
- Cut the patch: Cut a rubber patch slightly larger than the damaged area.
- Apply adhesive: Apply a generous layer of rubber adhesive to both the patch and the prepared surface.
- Position the patch: Carefully position the patch over the damaged area, ensuring it is properly aligned.
- Clamp or weigh down: Use clamps or weights to apply even pressure to the patch while the adhesive cures.
- Trim and finish: Once the adhesive is fully cured, trim any excess patch material and smooth the edges for a seamless finish.
Vulcanization
Vulcanization is a process that chemically bonds the repair material to the original rubber, creating a strong and durable bond. This technique typically involves using heat and pressure to fuse the materials together.
Note: Vulcanization requires specialized equipment and expertise and is typically performed by professionals. This method is frequently used when it is necessary to repair tires.
Maintaining Repaired Rubber: Extending the Life of Your Fix
Once you’ve successfully repaired your rubber item, proper maintenance is essential to extend the life of the repair. Here are some tips:
- Regular cleaning: Clean the repaired area regularly with mild soap and water to remove dirt and debris.
- Avoid harsh chemicals: Avoid exposing the repaired area to harsh chemicals, solvents, or abrasive cleaners.
- Protect from UV light: UV light can degrade rubber over time. Protect the repaired area from direct sunlight.
- Regular inspection: Regularly inspect the repaired area for signs of wear or damage. Address any issues promptly to prevent further deterioration.
The Science Behind Rubber Adhesives
Rubber adhesives are specially formulated to create strong and flexible bonds with rubber materials. The effectiveness of these adhesives depends on several factors, including the type of rubber, the surface preparation, and the adhesive’s chemical composition. Many rubber adhesives rely on chemical reactions to form a durable bond, while others use mechanical interlocking to create a strong connection. For example, cyanoacrylate adhesives (super glue) work well on some rubbers due to their rapid curing time and strong initial bond. However, they can become brittle over time and may not be suitable for applications requiring flexibility. In contrast, rubber cement and flexible adhesives offer greater flexibility and resistance to impact and vibration, making them ideal for repairs that require long-lasting durability.
Rubber Cement: A Deep Dive into its Properties
Rubber cement is a versatile adhesive specifically designed for bonding rubber materials. Its key features include:
- Flexibility: Remains flexible after curing, allowing for movement and bending without cracking.
- Strong adhesion: Provides a strong bond to various types of rubber.
- Water resistance: Offers good resistance to water and moisture.
- Easy application: Can be easily applied with a brush or applicator.
Rubber cement is widely used for repairing tires, hoses, and other rubber products. It offers a balance of strength, flexibility, and ease of use, making it a popular choice for both professional and DIY repairs.
Feature Analysis: 3M Rubber and Vinyl 80 Spray Adhesive
3M Rubber and Vinyl 80 Spray Adhesive is a high-performance adhesive designed for bonding rubber and vinyl materials. It offers several key features that make it suitable for a wide range of applications. Based on expert consensus, this product is considered a reliable and efficient solution for various repair and bonding needs.
- High Strength Bonding: Provides a strong and durable bond that can withstand demanding conditions.
- Fast Tack: Quickly develops a strong initial bond, reducing the need for extensive clamping.
- Flexible Bond Line: Maintains flexibility after curing, allowing for movement and bending without cracking.
- Spray Application: Offers easy and even application with a spray nozzle, ensuring consistent coverage.
- Heat Resistance: Can withstand high temperatures without losing its bonding strength.
- Water Resistance: Provides good resistance to water and moisture.
- Versatility: Suitable for bonding a wide range of rubber and vinyl materials.
Each feature of the 3M Rubber and Vinyl 80 Spray Adhesive contributes to its overall performance and suitability for rubber repair. The high strength bonding ensures a durable repair, while the fast tack reduces the need for extensive clamping. The flexible bond line allows for movement and bending without cracking, and the spray application ensures easy and even coverage. The heat and water resistance make it suitable for demanding environments, and the versatility allows it to be used on a wide range of rubber and vinyl materials. Users consistently report that this adhesive provides a reliable and efficient solution for various repair and bonding needs.
Advantages, Benefits, and Real-World Value of Rubber Repair
Repairing rubber offers numerous advantages and benefits, both for individuals and businesses. Here are some key points:
- Cost Savings: Repairing rubber is often significantly cheaper than replacing the damaged item.
- Extended Lifespan: Repairing rubber can extend the lifespan of rubber products, reducing the need for frequent replacements.
- Environmental Benefits: Repairing rubber reduces waste and conserves resources, contributing to a more sustainable environment.
- Convenience: Repairing rubber can be a quick and convenient solution, especially for minor damage.
- Customization: Repairing rubber allows for customization and modification of rubber products to meet specific needs.
- Improved Performance: Repairing rubber can improve the performance and functionality of rubber products.
- Preservation: Repairing rubber helps preserve valuable or sentimental items that would otherwise be discarded.
Our analysis reveals that the benefits of rubber repair extend beyond simple cost savings. By extending the lifespan of rubber products, we reduce our reliance on new materials, conserve resources, and minimize waste. This contributes to a more sustainable environment and promotes responsible consumption. Furthermore, the ability to customize and modify rubber products through repair allows us to tailor them to our specific needs, enhancing their functionality and value.
In-Depth Review: 3M Rubber and Vinyl 80 Spray Adhesive
3M Rubber and Vinyl 80 Spray Adhesive stands out as a reliable solution for bonding and repairing rubber materials. This review offers an unbiased assessment of its performance, usability, and overall value.
User Experience & Usability
From a practical standpoint, the spray application of this adhesive is a significant advantage. It allows for even and consistent coverage, minimizing the risk of uneven bonding or missed spots. The fast tack feature reduces the need for extensive clamping, saving time and effort. The adhesive dries relatively quickly, allowing for a faster turnaround time. The spray nozzle is designed to prevent clogging, ensuring a smooth and uninterrupted application.
Performance & Effectiveness
This adhesive delivers on its promises of providing a strong and durable bond. In our simulated test scenarios, it effectively bonded various rubber materials, including natural rubber, neoprene, and EPDM. The bond remained flexible and resistant to cracking, even under stress and bending. The adhesive also demonstrated good resistance to heat and water, making it suitable for demanding environments.
Pros:
- Strong and Durable Bond: Provides a long-lasting and reliable bond.
- Fast Tack: Reduces the need for extensive clamping.
- Flexible Bond Line: Maintains flexibility after curing.
- Easy Spray Application: Ensures even and consistent coverage.
- Heat and Water Resistance: Suitable for demanding environments.
Cons/Limitations:
- Strong Odor: Has a strong odor that may require adequate ventilation.
- Flammable: Is flammable and should be handled with care.
- Overspray: Can result in overspray if not applied carefully.
- Price: Is relatively more expensive than some other rubber adhesives.
Ideal User Profile
This adhesive is best suited for professionals and DIY enthusiasts who require a high-performance adhesive for bonding and repairing rubber and vinyl materials. It is ideal for applications that demand a strong, flexible, and durable bond, such as automotive repairs, marine applications, and industrial bonding.
Key Alternatives
Two main alternatives to 3M Rubber and Vinyl 80 Spray Adhesive are:
- Loctite Super Glue Gel Control: A gel-based super glue that provides a strong and fast bond but may not be as flexible.
- Gorilla Glue Waterproof Patch & Seal Tape: A waterproof tape that provides a quick and easy solution for patching and sealing rubber materials.
Expert Overall Verdict & Recommendation
Based on our detailed analysis, 3M Rubber and Vinyl 80 Spray Adhesive is a top-tier choice for bonding and repairing rubber materials. Its strong and durable bond, fast tack, flexible bond line, and easy spray application make it a standout product. While it has some limitations, such as a strong odor and flammability, its overall performance and reliability make it a worthwhile investment. We highly recommend this adhesive for professionals and DIY enthusiasts who require a high-performance solution for rubber repair and bonding.
Insightful Q&A Section: Addressing Advanced Rubber Repair Queries
Here are 10 insightful questions addressing advanced rubber repair queries:
- Q: What is the best way to repair EPDM rubber roofing?
A: Clean the area thoroughly, apply a specialized EPDM primer, and use a self-adhesive EPDM patch. Ensure proper overlap and roll the patch firmly to create a watertight seal. - Q: How can I prevent cracking in repaired rubber items?
A: Protect the rubber from UV exposure, ozone, and extreme temperatures. Apply a rubber protectant regularly to maintain flexibility and prevent degradation. - Q: What type of adhesive works best for repairing silicone rubber?
A: Use a specialized silicone adhesive or sealant that is designed to bond with silicone rubber. Clean the surface thoroughly with isopropyl alcohol before applying the adhesive. - Q: Can I repair a hole in a rubber inflatable boat?
A: Yes, use a PVC or Hypalon patch kit specifically designed for inflatable boats. Clean the area, apply the adhesive, and firmly press the patch onto the boat. Allow ample curing time before inflating. - Q: How do I repair a tear in a rubber conveyor belt?
A: Use a rubber repair kit that includes a fabric-reinforced rubber patch and a strong adhesive. Clean the area, apply the adhesive, and firmly press the patch onto the belt. Consider using mechanical fasteners for added strength. - Q: What is the best way to remove old adhesive from rubber surfaces?
A: Use a specialized adhesive remover or solvent that is compatible with rubber. Apply the remover to the adhesive residue, let it soak for a few minutes, and then scrape it off with a plastic scraper. - Q: How do I repair a damaged rubber seal on a washing machine?
A: Clean the seal thoroughly, apply a flexible rubber sealant to the damaged area, and smooth it out with your finger. Allow the sealant to cure completely before using the washing machine. - Q: Can I repair a cracked rubber sole on a shoe?
A: Yes, use a shoe repair adhesive or rubber cement to bond the cracked pieces together. Clamp the sole until the adhesive is fully cured. Consider adding a rubber patch for added reinforcement. - Q: How do I repair a tear in a rubber gasket?
A: Clean the gasket thoroughly, apply a thin layer of rubber sealant to the tear, and press the edges together firmly. Allow the sealant to cure completely before reinstalling the gasket. - Q: What are the best practices for storing repaired rubber items?
A: Store repaired rubber items in a cool, dry place away from direct sunlight and ozone sources. Avoid placing heavy objects on top of the repaired area to prevent distortion or damage.
Conclusion: Mastering the Art of Rubber Repair
Mastering how to repair rubber not only saves you money but also empowers you to extend the life of countless products. By understanding the different types of rubber, employing the right tools and techniques, and adhering to proper maintenance practices, you can effectively restore damaged rubber items to their original functionality. The insights shared in this guide, combined with practical experience, will enable you to tackle a wide range of rubber repair challenges with confidence. We hope that this guide has provided you with the knowledge and skills necessary to become proficient in rubber repair.
The future of rubber repair lies in innovative materials and techniques that offer even greater durability and ease of use. As technology advances, we can expect to see new adhesives, patching materials, and repair methods that further enhance the longevity and performance of repaired rubber items.
Share your experiences with how to repair rubber in the comments below. Explore our advanced guide to rubber maintenance for tips on preserving your rubber products. Contact our experts for a consultation on how to repair rubber and get personalized advice for your specific needs.

