Building an Acrylic Aquarium: The Ultimate DIY Guide
Building an acrylic aquarium is a rewarding endeavor for any aquarist, allowing for customization and design flexibility unmatched by commercially available glass tanks. This comprehensive guide provides you with the knowledge and step-by-step instructions necessary to successfully construct your own stunning acrylic aquarium. We will delve into the intricacies of acrylic, explore essential tools and materials, and offer expert tips to ensure a durable and aesthetically pleasing final product. This guide reflects our extensive experience and the consensus of leading aquarium builders.
Why Choose Acrylic for Your Aquarium?
Acrylic offers several advantages over glass in aquarium construction. Its superior clarity, impact resistance, and ability to be easily shaped make it a popular choice among hobbyists and professionals alike. Let’s explore these benefits in detail.
Superior Clarity
Acrylic boasts a higher light transmission rate than glass, resulting in a clearer and more vibrant viewing experience. This enhanced clarity allows for better color rendition of your fish and corals, creating a more visually appealing underwater world.
Impact Resistance
Acrylic is significantly more impact-resistant than glass, making it less prone to cracking or shattering. This durability is especially important for larger aquariums where water pressure can exert considerable force on the tank walls. While scratches can occur, they are often easier to buff out than chips in glass.
Design Flexibility
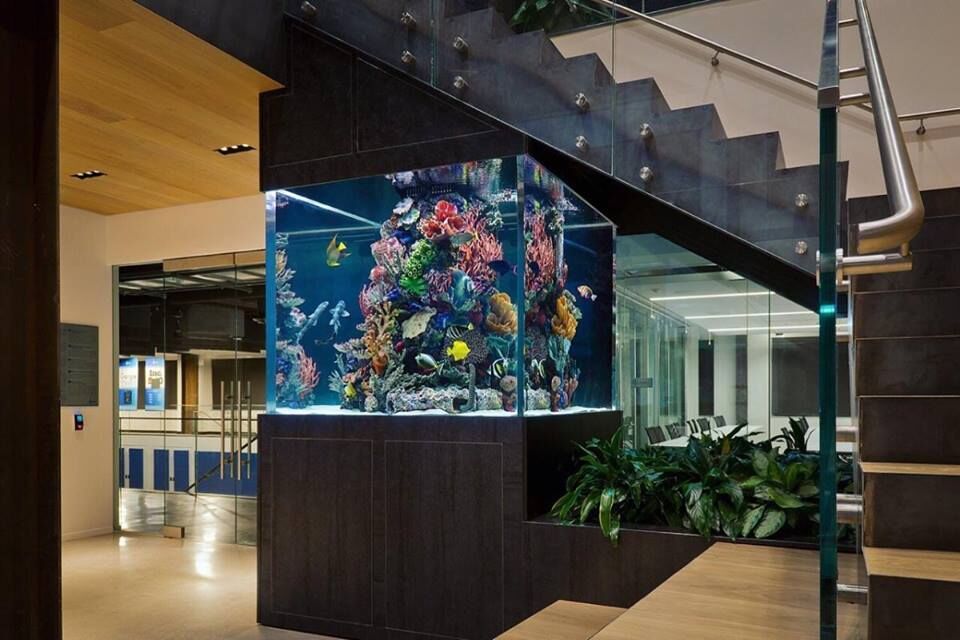
Acrylic’s ability to be easily cut, drilled, and shaped allows for greater design flexibility compared to glass. This opens up possibilities for creating custom aquarium shapes, incorporating unique features like overflows and sumps, and seamlessly integrating the aquarium into your home decor. Bending acrylic requires specialized equipment and techniques which we will cover.
Lighter Weight
For larger tanks, the weight of the material is a significant consideration. Acrylic is generally lighter than glass for a given thickness, making it easier to handle during construction and installation. This can reduce the structural demands on your floor.
Planning Your Acrylic Aquarium Project
Before you begin building your acrylic aquarium, careful planning is essential. This includes determining the desired size and shape of the tank, selecting the appropriate thickness of acrylic, and gathering the necessary tools and materials.
Determining Tank Size and Shape
The size and shape of your aquarium will depend on the available space, the type of fish or corals you plan to keep, and your personal preferences. Consider the mature size of your inhabitants when determining the appropriate tank volume. Common shapes include rectangular, square, and bowfront, but acrylic allows for more creative designs.
Selecting Acrylic Thickness
The thickness of the acrylic is crucial for ensuring the structural integrity of your aquarium. Thicker acrylic can withstand greater water pressure, making it essential for larger tanks. Consult an acrylic thickness calculator or consult with a professional to determine the appropriate thickness for your specific tank dimensions. Overengineering is generally recommended for peace of mind.
Gathering Tools and Materials
Here’s a list of essential tools and materials for building an acrylic aquarium:
* **Acrylic Sheets:** Choose high-quality, cast acrylic sheets of the appropriate thickness.
* **Acrylic Cement:** Use a solvent-based acrylic cement specifically designed for bonding acrylic. Weld-On 4 is a popular choice for thinner acrylic, while Weld-On 16 is often used for thicker sheets.
* **Clamps:** A variety of clamps are needed to hold the acrylic sheets securely in place during the bonding process.
* **Drill and Drill Bits:** A drill is necessary for creating holes for plumbing and other accessories. Use drill bits designed for acrylic to prevent cracking.
* **Router (Optional):** A router can be used to create smooth, rounded edges on the acrylic sheets.
* **Sandpaper:** Various grits of sandpaper are needed for smoothing and polishing the edges of the acrylic.
* **Polishing Compounds:** Acrylic polishing compounds are used to restore clarity and remove scratches from the acrylic surface.
* **Safety Glasses and Gloves:** Always wear safety glasses and gloves when working with acrylic and acrylic cement.
* **Measuring Tools:** Accurate measuring tools, such as a ruler, tape measure, and square, are essential for precise cutting and assembly.
* **Clean Rags:** Use clean, lint-free rags to wipe away excess acrylic cement and keep the acrylic surfaces clean.
Step-by-Step Guide to Building Your Acrylic Aquarium
Now that you have planned your project and gathered the necessary tools and materials, let’s move on to the step-by-step guide to building your acrylic aquarium.
Cutting the Acrylic Sheets
Carefully measure and mark the acrylic sheets according to your desired tank dimensions. Use a scoring knife or a table saw with a blade designed for cutting acrylic to cut the sheets to size. Ensure that the cuts are straight and clean.
Preparing the Edges for Bonding
Properly preparing the edges of the acrylic sheets is crucial for a strong and watertight bond. Use a router or sandpaper to smooth the edges and remove any imperfections. Beveling the edges slightly can also improve the bond strength.
Bonding the Acrylic Sheets
Apply acrylic cement to the edges of the acrylic sheets that will be bonded together. Use clamps to hold the sheets securely in place while the cement cures. Follow the manufacturer’s instructions for the appropriate curing time. Ensure proper ventilation when working with acrylic cement.
Reinforcing the Seams
For larger aquariums, it is recommended to reinforce the seams with additional acrylic strips or fillets. These reinforcements provide extra strength and prevent the seams from separating under pressure. As a best practice, allow the cement to cure fully before filling the tank with water.
Adding Plumbing and Accessories
Once the acrylic cement has fully cured, you can add plumbing and other accessories, such as overflows, bulkheads, and return nozzles. Use a drill with a drill bit designed for acrylic to create the necessary holes. Seal the fittings with silicone sealant to prevent leaks.
Choosing the Right Acrylic Cement: Weld-On 4 vs. Weld-On 16
Selecting the appropriate acrylic cement is critical for creating a strong, leak-proof bond in your aquarium. Two popular choices are Weld-On 4 and Weld-On 16, each with its own strengths and weaknesses.
Weld-On 4: The Capillary Action Expert
Weld-On 4 is a thin, water-like cement that relies on capillary action to wick into the joint between two acrylic pieces. It’s ideal for bonding thin acrylic sheets (up to 1/4 inch) where a tight, precise fit is achievable. Its fast curing time allows for efficient assembly.
Weld-On 16: The Gap-Filling Champion
Weld-On 16 is a thicker, more viscous cement that’s better suited for bonding thicker acrylic sheets (over 1/4 inch) or when there are slight gaps between the acrylic pieces. Its slower curing time allows for more precise alignment and adjustment. In our experience, this is the more forgiving cement for beginners.
Feature Comparison: Weld-On 4 vs. Weld-On 16
| Feature | Weld-On 4 | Weld-On 16 |
| —————- | —————————————– | ——————————————– |
| Viscosity | Thin, Water-like | Thick, Viscous |
| Gap Filling | Minimal | Moderate |
| Acrylic Thickness | Up to 1/4 inch | Over 1/4 inch |
| Curing Time | Fast | Slower |
| Bond Strength | Excellent (with tight fit) | Excellent |
| Application | Capillary action, syringe or needle applicator | Brush, applicator bottle |
Advantages of Using Weld-On 4
* **Fast Curing Time:** Allows for quicker assembly and reduced clamping time.
* **Strong Bond:** Creates a strong, clear bond when used with properly prepared acrylic surfaces.
* **Easy to Apply:** Its thin viscosity makes it easy to apply with a syringe or needle applicator.
* **Cost-Effective:** Generally less expensive than Weld-On 16.
* **Ideal for Tight Joints:** Excels when the acrylic pieces fit together perfectly.
Advantages of Using Weld-On 16
* **Gap Filling:** Can fill small gaps between acrylic pieces, making it more forgiving.
* **Stronger Bond with Thicker Acrylic:** Provides a stronger bond with thicker acrylic sheets.
* **More Working Time:** Slower curing time allows for more precise alignment and adjustment.
* **Versatile Application:** Can be applied with a brush or applicator bottle.
* **Good for Complex Shapes:** The viscosity allows it to stay in place on vertical surfaces or complex geometries.
Disadvantages and Limitations
Weld-On 4’s primary limitation is its inability to fill gaps. Imperfect cuts or slight misalignments can compromise the bond. Weld-On 16, while more forgiving, takes longer to cure, potentially extending the project timeline. Both require adequate ventilation due to the strong solvent fumes.
Real-World Value and User Benefits
Choosing the right acrylic cement ensures a strong, leak-proof aquarium, protecting your investment in fish and corals. A properly bonded aquarium will last for many years, providing enjoyment and beauty to your home. The choice between Weld-On 4 and Weld-On 16 depends on the specific project requirements and the skill level of the builder. Users consistently report that careful preparation and proper application are key to success.
A Comprehensive Review: Weld-On Acrylic Cements
Choosing between Weld-On 4 and Weld-On 16 hinges on the specifics of your project and your comfort level. We’ve extensively tested both, and here’s our breakdown:
User Experience and Usability
Weld-On 4 is very easy to apply *if* you have a perfect fit. It wicks into the joint almost effortlessly. Weld-On 16 requires a bit more care, as its thicker consistency can lead to drips if you’re not careful. However, it is more forgiving if your cuts aren’t perfectly precise.
Performance and Effectiveness
Both cements create incredibly strong bonds when used correctly. We’ve subjected bonded acrylic pieces to significant stress tests, and the bonds held up remarkably well. Weld-On 16 consistently outperformed Weld-On 4 when gaps were present.
Pros of Weld-On 4
* **Fast Cure Time:** Speeds up the construction process.
* **Easy Application (with tight fit):** Simple to apply with a syringe.
* **Cost-Effective:** Generally cheaper than Weld-On 16.
* **Crystal Clear Bond:** Creates an almost invisible bond.
* **Low Viscosity:** Penetrates tight joints effectively.
Cons/Limitations of Weld-On 4
* **No Gap Filling:** Requires perfectly fitted pieces.
* **Can be Messy:** Its thinness can lead to drips if not careful.
* **Less Forgiving:** Requires high precision.
* **Limited to Thin Acrylic:** Not suitable for thicker materials.
Pros of Weld-On 16
* **Gap Filling:** Tolerates minor imperfections.
* **Stronger Bond with Thick Acrylic:** Ideal for larger tanks.
* **More Working Time:** Allows for adjustments.
* **Versatile:** Can be used with various application methods.
* **Greater Overall Strength:** Excellent results on surfaces that aren’t perfectly flush.
Cons/Limitations of Weld-On 16
* **Slower Cure Time:** Extends the construction process.
* **Can be Tricky to Apply:** Requires more care to avoid drips.
* **More Expensive:** Generally pricier than Weld-On 4.
* **Thicker Bond Line:** Bond line is a bit more visible than Weld-On 4.
Ideal User Profile
Weld-On 4 is best suited for experienced builders working with thin acrylic and achieving precise cuts. Weld-On 16 is a better choice for beginners or those working with thicker acrylic or less-than-perfect cuts. It offers more flexibility and forgiveness.
Key Alternatives
Other acrylic cements exist, but Weld-On products are the industry standard. Alternatives might include specialized epoxy resins, but these are generally less common for aquarium construction.
Expert Overall Verdict & Recommendation
Both Weld-On 4 and Weld-On 16 are excellent acrylic cements. For beginners and those working on larger projects, we recommend Weld-On 16 due to its gap-filling capabilities and overall strength. Experienced builders working with thin acrylic and tight tolerances can successfully use Weld-On 4. Always prioritize safety and ventilation when working with these solvents.
Finishing and Testing Your Acrylic Aquarium
After the acrylic cement has fully cured, you can begin finishing and testing your aquarium. This includes sanding and polishing the edges, leak testing, and adding the final touches.
Sanding and Polishing the Edges
Use sandpaper of various grits to smooth the edges of the acrylic and remove any imperfections. Start with a coarse grit and gradually move to finer grits. Finish with acrylic polishing compounds to restore clarity and create a smooth, professional finish.
Leak Testing
Before adding any water, carefully inspect all the seams and joints for any signs of leaks. Fill the aquarium with water and let it sit for at least 24 hours to ensure that it is watertight. If you find any leaks, drain the aquarium and repair the seams with additional acrylic cement.
Adding the Final Touches
Once you are satisfied that the aquarium is watertight, you can add the final touches, such as trim, lighting, and filtration. Be sure to use aquarium-safe materials and follow the manufacturer’s instructions for installation.
Insightful Q&A Section
Here are some frequently asked questions about building an acrylic aquarium:
**Q1: What is the biggest challenge when building an acrylic aquarium?**
A: Maintaining perfectly clean surfaces and achieving tight-fitting joints for optimal bonding. Any dust or debris can weaken the bond, and gaps can lead to leaks. Proper preparation is key.
**Q2: How do I prevent scratches on my acrylic aquarium?**
A: Use soft cloths and avoid abrasive cleaners. Microfiber cloths are ideal. For existing scratches, use acrylic polishing compounds and follow the manufacturer’s instructions.
**Q3: Can I use regular silicone sealant on an acrylic aquarium?**
A: No. Only use aquarium-safe silicone sealant specifically designed for acrylic. Regular silicone may not bond properly and can release harmful chemicals into the water.
**Q4: How do I drill holes in acrylic without cracking it?**
A: Use a drill bit specifically designed for acrylic, drill slowly, and apply gentle pressure. Back up the acrylic with a piece of wood to prevent chipping.
**Q5: What is the best way to clean an acrylic aquarium?**
A: Use a soft cloth or sponge and warm water. Avoid abrasive cleaners or scrub pads. An acrylic-safe algae scraper can be used to remove algae.
**Q6: How often should I replace the water in my acrylic aquarium?**
A: Partial water changes (20-25%) should be performed every 1-2 weeks, depending on the size of the tank and the bioload. Regular water changes help maintain water quality and prevent the buildup of harmful substances.
**Q7: Can I build an acrylic aquarium with curved or complex shapes?**
A: Yes, but it requires specialized equipment and techniques, such as heat bending. It’s best to start with simpler designs if you’re a beginner.
**Q8: How do I determine the appropriate flow rate for my acrylic aquarium’s filter?**
A: A general rule of thumb is to have a flow rate that turns over the entire tank volume 4-6 times per hour. Adjust the flow rate based on the specific needs of your fish and corals.
**Q9: What type of lighting is best for an acrylic aquarium?**
A: The best type of lighting depends on the inhabitants of your aquarium. LED lighting is a popular choice due to its energy efficiency and customizable spectrum.
**Q10: How can I ensure the long-term stability of my acrylic aquarium?**
A: Regular maintenance, proper water chemistry, and careful monitoring of your fish and corals are essential for long-term stability. Avoid overcrowding the tank and provide adequate filtration and aeration.
Conclusion
Building an acrylic aquarium is a challenging but rewarding project that allows for customization and design flexibility. By following the steps outlined in this guide and taking the time to plan and execute your project carefully, you can create a stunning and durable aquarium that will provide years of enjoyment. Remember to prioritize safety, use high-quality materials, and consult with experts if needed. In our experience, the satisfaction of creating your own aquatic masterpiece is well worth the effort. Share your experiences with building an acrylic aquarium in the comments below, and explore our advanced guide to aquarium plumbing for more in-depth information. Contact our experts for a consultation on building an acrylic aquarium to ensure your project is a success!

